 Today was my Mum’s birthday. We had a lovely (hot!) day together shopping and lunching – with Maia, it was a day that only girls really enjoy… no pesky husbands/sons hurrying us along. Now if there is one person who likes a bargain more than I do it’s Mum, so we had a great time finding all kinds of things we really NEED and couldn’t say no to… like bamboo tumblers and plates (biodegradable you know, but remarkably still dishwasher safe *how does that work I wonder*), a new bag – which I can fit my camera in-but-is-not-giant, and a very cute jewellery tree! The lunch included a rather delicious plum and white chocolate cheesecake, and tall glasses of cold beverages which concluded the outing rather nicely. If only I was still in that lovely cool department store right now (its sweaty again here tonight)…
Anyways, back to the purpose of this post, in a fit of inspiration yesterday I created this cute card… which I think turned out rather well, so I thought I’d share how it was made.
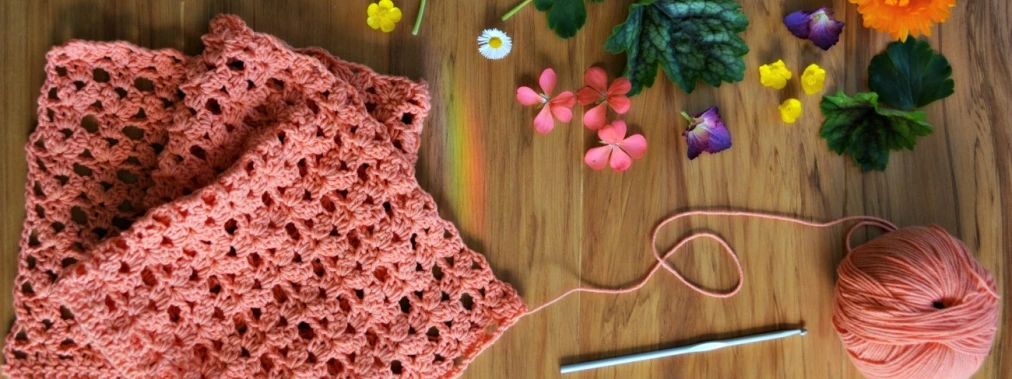
 Step 1. First up make some flowers. I used a 3ply cotton and a 2.5mm hook… but you could use any yarn and corresponding hook. Embroidery floss and a 1.5mm hook would be cute. Make a magic circle and chain 1. Sc 10 times into the circle:
 Pull tight and join with a slip stitch:
 Chain 2, DC into the next stitch 3 times, chain 2…
 …and slip stitch into the next stitch (one petal made).
 Repeat (chain 2, 3 dc into next stitch, chain 2, ss into next stitch) to make 4 more petals (5 in total) and ss into the bottom of your starting chain to finish.
 Pull your magic circle super tight, fasten off the ends and voila… one cute tiny flower:
 Make two more in different colors and sew a small button in the center of each one.
Step 2: Make desired number of leaves using green cotton:
Chain 7 ss in second chain from the hook, hdc in next stitch, dc in next 2 stitches, hdc in next, ss in last stitch. Fasten off and weave in ends.
Step 3: Select your card. I like to rule my lines to make sure my sewing is straight:
 Then with a rubber under the front of the card, use your needle to punch holes the length of the line (stem) so your stitches are even(ish):
 Step 4: Stitch the stems, up, then back (fasten off after each one):
 Step 5: And glue your flowers and leaves in place:
 And there you have a very happy little card! I’m thinking I might make another and frame it… What do you think?
I also wanted to say thank you for all the lovely comments about the toy tents. The children are loving them, and as we are going camping (for real) in a couple of days they will be coming along to. If you do make a tent (or two) I hope your children enjoy them as much as Maia and Carter! Jxx

It is totally delightful. I want to make and frame one just for me!
LikeLike
How lovely going to do one for my granddaughter.
LikeLike
This card is really cute!!!!!
happy weekend, xxx Ale
LikeLike
stunning card!
LikeLike
Oooh! Love it! Definitely make one to frame. It would make a great gift too (in the frame, I mean)
LikeLike
A lovely simple idea. And cheaper I imagine that a lot of shop cards these days!
LikeLike
thank you very much for liking my post! you have some really nice crochet patterns here. I’m better at knitting, but perhaps I will give crocheting another shot!
LikeLike
Qué linda tarjeta.
LikeLike
Beautiful! x
LikeLike
That is so adorable!! Thank you for your tutorial! I can’t wait to make one too!!
LikeLike
What a great teaching tool for children who are just learning to crochet and embroider. Thank you.
LikeLike
Looks just like the lamp pole in front of my house – don’t you think? 🙂
http://haekelmonster.wordpress.com/2012/12/13/winter-flowers/
Have a lovely weekend!
LikeLike
It does 🙂 a little cooler though, how I’d like to walk in that snow just for a few minutes!!!
LikeLike
Janette – I don’t know you (except for your postings) but I know where you are and every night when they report about Australia in the (German) news I wonder how you are. I would send some of the snow if I could!
LikeLike
Wow, what a great idea! Think I will try this one when I improve my skills a bit more. Thanks for the encouragement on my blog 🙂 xoxox
LikeLike
It looks wonderful! I know if I received a card like that, I’d treasure it forever. 🙂 Beautiful!
LikeLike
This is so cute! I think I may have to stock up on these for thank you cards!
LikeLike
What a pretty card. I was given a store bought one with only one crochet flower on it and it cost my friend a fortune! Yours is prettier than that one. Glad you had a fun day. Lily. xxx
LikeLike
That’s adorable! And with my limited crochet skills, I think I could even make those.
Oh, how I miss summer! Enjoy yours!
LikeLike
Fantastic idea! Now I have another project to add to my list of to-dos! Thanks for the tutorial and especially for the link to the magic circle video – I’ve been crocheting since I was about 9 and quit reading beginner instructions quite some time ago, so had not heard of this. Another tool for the toolbox. . .
LikeLike
So cute!!
LikeLike
Perfect, something simple and cute!!
LikeLike
Very cute card. I will have to keep it in mind next time I need a card for some occasion.
Cindy
LikeLike
Such a beautiful card! Thank you for sharing.
LikeLike
Thank you so much for sharing this wonderful idea – this is too cute! I’ll get crafting right now – there are a few birthdays coming…
LikeLike
Gorgeous little card! Wish I could do something like that for my mum 🙂
LikeLike
What a cute idea! Would be a perfect card for mother’s day, too! Thank you for sharing!
LikeLike
Sounds like a wonderful birthday outing! Happy birthday to your mom! That card is so cute! Best wishes, Tammy
LikeLike
Love it! It’s so cute. It even looks somewhat easy.
LikeLike
these look so delicate and wonderful!
LikeLike
So cute =>
LikeLike
Me gustó mucho. Que tengas un maravilloso Año 2013!!!!
LikeLike
What a lovely idea, I have seen a card with baby bootees on for a newborn but these flowers are brilliant and much more versatile, I love the bright cheery colours and pretty buttons. Looking forward to trying it out myself.
LikeLike
I love your card and the colours are gorgeous, I have just started to crochet and this will be a great project for me to try.
LikeLike
I love your card and the colours, I am a knitter who has just started to crochet and this is going to be a good beginner project for me as my god daughter has a birthday coming up!
LikeLike
Thank Yvonne, I hope your god daughter likes it!! HCC
LikeLike
thank you, I made the card for my mother and a friend (not with the button since it has to go by post) and… I didn’t sew the stem of the flower (have not the appropriate paper and sewing needle), I just drew it with a nice green pen… thank you very much for sharing this pattern !
LikeLike
Thank you! I enjoyed making this project. You have wonderful instructions and pictures. 🙂
LikeLike
Just found this by looking for a birthday card to crochet…thank you for the idea, fantastic creation.
LikeLike
Obrigado! Gostei de fazer esse projeto.
LikeLike
Lovely card
LikeLike