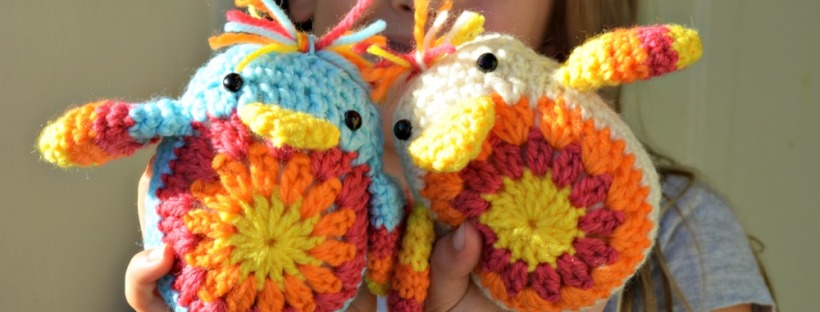
As promised, a new friend for your bunnies! Here’s a cute easy chick for you to crochet: This chick is super easy, I promise you will be able to whip 1 or 3 up in no time at all – I know Easter is almost here… but these guys are a breeze to make!
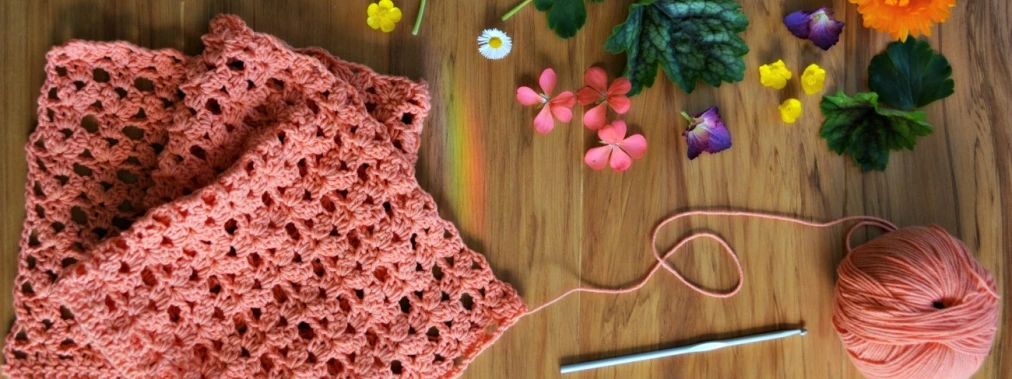
If you would like to make some chicks in time for Easter you will need:
- Various scraps of yarn and a corresponding hook – I used 8ply and a 4mm hook.
- 2 x 9mm safety eyes (or beads or buttons)
- A needle to sew your creation together with.
1. The body- this is the SAME as the bunny – so for detailed round by round photos check out this tutorial.
 Round 1: Make a Magic Circle and chain 3, then crochet 13 DC into the circle and pull tight, join with a SS to complete the round (14 DC). I’ve had a few questions about the magic circle before, it’s my preferred way to start a round. You can find a video showing how it’s done here. If you prefer chain 4 and DC into the fourth chain from the hook (then your DCs) or chain four, join with a SS to form a ring and then chain 3 and 13 DC into the ring. All techniques work equally well, I think it just comes down to preference.
Round 2. Join yarn in space between two DCs, chain 3 and DC in between the same space. 2 DC between each stitch around, join with a SS to the top of chain 3 to complete the round. Fasten off.(14 2DC pairs).
Round 3. Join yarn in space between two pairs of DCs, chain 3 and 2 DC in same space. Make 3DCs in each space between two pairs of DCs around, join with a SS to the top of chain 3 to complete the round. Fasten off. (14 3DC pairs).
Round 4. You are now working in the top space between each stitch, not the space beside the stitch. Join your new colour through the top loop of the stitch only. Chain 2, 2DC into next stitch, 1 DC into next, 1 DC into next, 2DC into next stitch, 1 DC into next, 1 DC into next, 2DC into next stitch, 1 HDC into next, Chain 1, SC into each remaining stitch around. Complete round by joining with a SS into the Chain 2. Do not fasten off.
Round 5. Chain 1, SC into each stitch around. SS into chain 1.
Round 6. Chain 1, HDC in next 11 stitches, chain 1, SS into next stitch. Fasten off leaving a long end to sew your two bunny halves together. Repeat – you need a front and a back! 2. The beak:
Round 1: Magic circle (see notes above), CH 1 and 6 SC into the circle, do not join this or any round, continue working in a circle without joining. Use a stitch marker if necessary to mark your rounds (personally I just count the stitches) (6)
Round 2: *SC in the next stitch, 2 SC in the next stitch*, repeat between * and * around (9).
Round 3: *SC in the next 2 stitches, 2 SC in the next stitch*, repeat between * and * around (12).
Round 4: SC in each stitch around. Fasten off leaving a long tail. 3. The wings (make two!):
Round 1: Magic circle (see notes above), CH 1 and 6 SC into the circle, do not join this or any round, continue working in a circle without joining. Use a stitch marker if necessary tp mark your rounds (personally I just count the stitches) (6)
Round 2: SC in the next stitch, 2 SC in the next stitch*, repeat between * and * around (9).
Round 3:*SC in the next 2 stitches, 2 SC in the next stitch*, repeat between * and * around (12). Change colour.
Round 4:*SC in the next 3 stitches, 2 SC in the next stitch*, repeat between * and * around (15).
Round 5:SC in each stitch around (15). Change colour.
Round 6:SC in each stitch around (15).
Round 7:SC in each stitch around (15). Change colour.
Round 8: *SC in the next 3 stitches, 2 SC together (decrease) in the next stitch*, repeat between * and * around (12).
Round 9: SC in each stitch around (12).
Round 10: Sc in each stitch around. Fasten off leaving a long tail. That’s all your chick parts assembled…. now to put them all together.
 Position eyes and secure, and sew on beak:
  With wrong sides together sew front to back:
 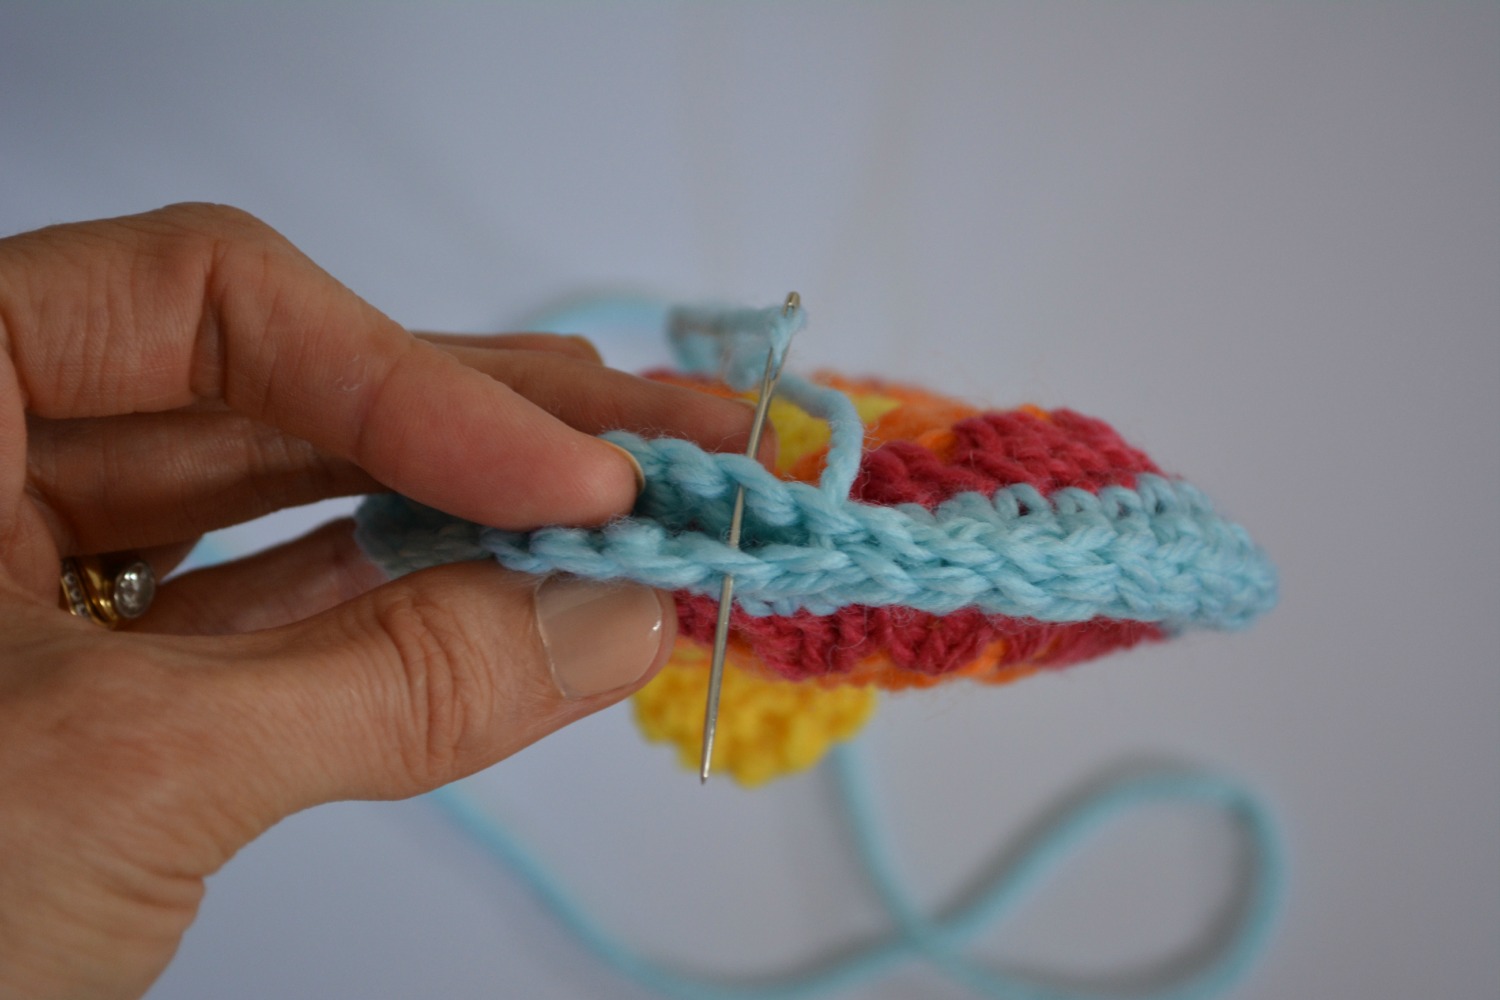 Leave a small gap, stuff, then finish sewing together. Looking pretty cute!
 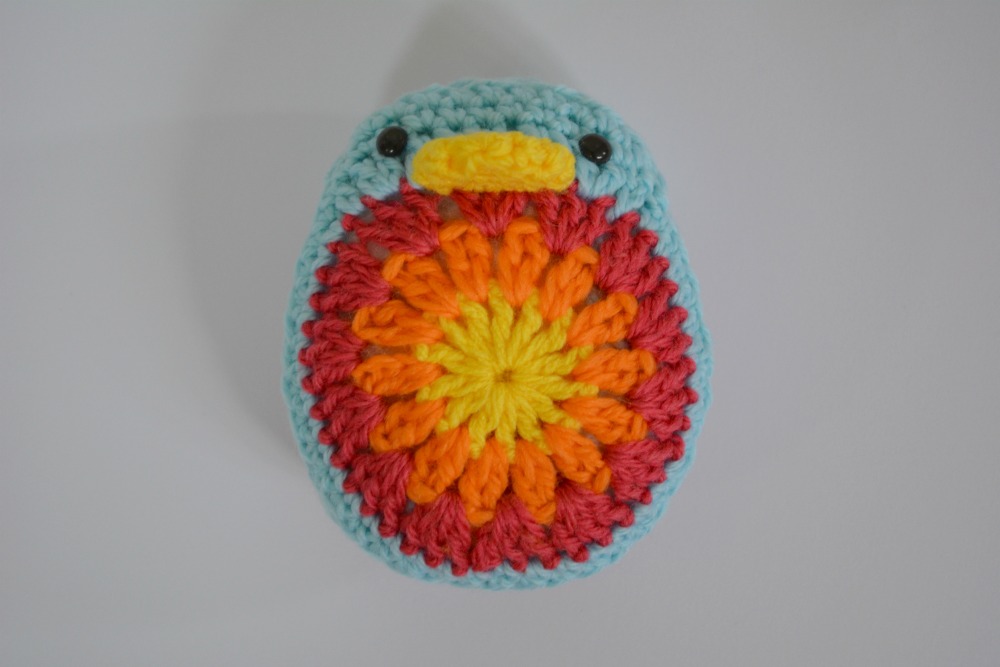 Sew wings in place:
  Almost done… just a little tuft on the top! Sew through 2 strands of each color:
  Tie in a knot and snip to desired length… you’re all finished!
 Happy Easter everyone! Janette xox
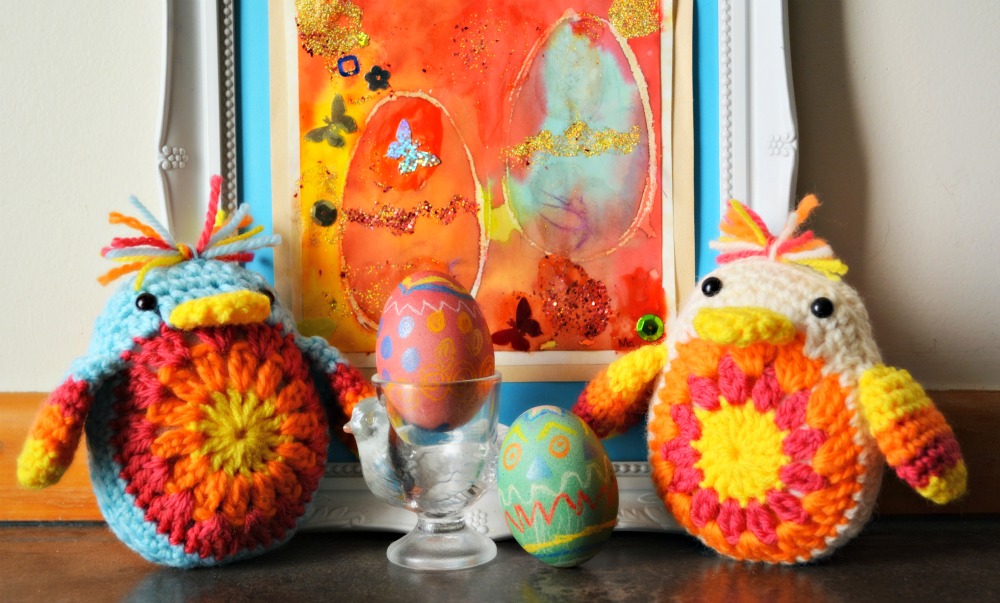

Thank you Janette for this lovely chick!!!!!
Happy Easter to you, too!!!!
xxxxxx Ale
LikeLike
Thanks Ale, I hope you have a lovely Easter with your family! xox
LikeLike
Oh, these are so cut. My children are grown my grandchildren are grown so… I am going to make these for me! Thank you and Happy Easter.
LikeLike
What a wonderful idea! Have a lovely Easter Cecile!
LikeLike
Thank you so much Janette! These are absolutely amazing . I made a whole lot of Easter bunnies and will definitely be making these. Thank you once again for all the trouble you take . You are a real blessing. A very Happy Easter to you and your beautiful family.
LikeLiked by 1 person
Its my absolute pleasure Sharon, I hope you have a wonderful Easter too! Janette xoxox
LikeLike
Ah they’re so cute! I miss crocheting! All I’ve done since I’ve been back in Australia is job application after job application! Everything else is on hold! But I wonder if I can sneak in a bit of crochet this week since…? Happy Easter Janette!
Ling x
LikeLike
Good luck with the job hunting, I hope something turns up soon! Have a lovely Easter 🙂 Jxox
LikeLike
The chicks are gorgeous. There will be steam coming off my hook when I sit down this evening! I know my daughter will love them. We are spending Easter Sunday with some friends and their children so will make one each for them too. They will be a welcome break from the hexagon blanket I’m making. The sun is shining here – finally- after a very wet winter so will be spending the day in the garden. Hope you enjoy your day x
LikeLike
Goodness you are going to be busy! I hope you have a lovely Easter xox
LikeLike
After an evening of crochet, Cheep Cheep has become a very welcome member of the family. My daughter loves him! Thank you for sharing your pattern. X
LikeLike
Hi Janette,
Your Easter chicks are soooo cute. I love them :0)
Jacquie x
LikeLike
Thank Jacquie! I hope you have a lovely Easter with your family 🙂 xx
LikeLike
Your little chicks are really sweet…and their little tufts are great!!
LikeLike
Aww I love the tufts too! Happy Easter Trixi xx
LikeLike
So cute! Thank you for sharing your pattern. Happy Easter, Pj x
LikeLike
My pleasure, I hope you have a lovely Easter! Janette x
LikeLike
Really cute! Thanks for the pattern. Happy Easter!
LikeLike
Thank you, hope you have a lovely Easter with your family too! Xxx
LikeLike
Awesomeness! Thank you for sharing your adorable pattern!! Happy Easter Hugz to you and your family! Hugz Lisa and Bear
LikeLike
Hugs to you too Lisa and Bear! Xo
LikeLike
SOOO CUTE! And your patterns are so easy to follow. Thank you!
LikeLike
Thanks! Hope you have a happy Easter! Xx
LikeLike
These are cute!
LikeLike
Thanks Colline, have a great Easter x
LikeLike
You too Janette
LikeLike
Sew adorable and the pictures and instructions make it look like a pattern even I could follow. I usually end up making up my own patterns because I can’t understand others. This one looks great.
LikeLike
Have a wonderful Easter Lucinda xx
LikeLike
Nicely done- your instructions are terrific. What a cute gift idea. -Sharon
LikeLike
Thanks Sharon, I’ve got a few more to make myself! Xx
LikeLike
Thank you very much for the pattern. Happy Easter to you and your family.
LikeLike
Thank you Ausra, wishing you a happy Easter too! Xx
LikeLike
Hi thanks for pattern, I have just made one and it looks great Happy Easter x
LikeLike
Oh wow, that was fast! I hope he’s cute 🙂 happy Easter to you! Xx
LikeLike
adorable! 🙂
LikeLike
They are pretty cute 🙂 happy Easter!
LikeLike
Thanks for the pattern! I’m going to make one for my niece. Happy Easter!
LikeLike
I hope she loves it! Have a happy Easter xo
LikeLike
Very cute !! 🙂
LikeLike
Thanks! Wishing you a very happy Easter xx
LikeLike
Happy Easter to you too !! 🙂
Izabel
LikeLike
Happy Easter!! I shared on my FB Fan Page. You make so many cute things!!
LikeLike
Thank you! Happy Easter!
LikeLike
Your welcome!
LikeLike
Thank you so much for this amazing pattern! I made a bunny for each of my children last year, so these chicks will be perfect friends for them!
Happy Easter!!
Megan
LikeLike
I hope you children love them as much as mine 🙂
LikeLike
These are great! Will be making some of these this weekend. Thanks for sharing your pattern. Would you mind if I share a link on my FB page? Happy Easter. Karen :O)xx
LikeLike
That would be wonderful! Happy Easter x
LikeLike
These are fabulous. I’ve made a bunny, so I’ll definitely be making one of these!
LikeLike
Hope you had a great Easter x
LikeLike
Oh my god! These are adorable! I already love thr bunny but these might be even cuter!
Take care, Anne
p.s. i made cats which work with the same circle pattern idea. They are on my blog.
LikeLike
Your cat is too cute! Happy Easter Anne x
LikeLike
Thank you! I enjoyed making it!
I think I might give your little chicken a try tonight… Hm, so many projects, too little time. Good things these litte animals are quick to make!
I usually fill my cats/owls/bunnies with peas or cherry pits. They sit better this way and people just love to hold them as stress relievers and so on…
Take care,
Anne
http://crochetbetweentwoworlds.blogspot.de
LikeLike
The colours are so gorgeous – and the chick super cute! What a fabulous Easter project. Happy Easter to you and yours. xoxoxoxoxox
LikeLike
Thank you, happy Easter to you too!
LikeLike
Janette, I loved your owls and bunnies and now I love Cheep Cheep, too. I haven’t made any of these yet as I still have unfinished projects to work on, but I will . . . I’m thinking now is the time to make them for next Easter . . . I always seem to wait for the last minute and then don’t have time. Thanks so much for your patterns. They are so easy to follow!
Hope you’re having a lovely Easter . . . ~ LInne
LikeLike
Sounds like a great plan Linne! My Easter was lovely, hope yours was a good one too 🙂 x
LikeLike
As usual, a really wonderful pattern. Thanks and happy Easter!
LikeLike
Happy Easter to you too 🙂
LikeLike
Hi Janette, made a whole lot of these Easter chicks and gave them to family and friends. My sister-in-law loves cheep cheep and calls him her Rastafarian! Thank you once again.
LikeLike
Hi Sharon, how exciting… I’m glad they turned out well and we’re well loved! X
LikeLike
A lovely cheerful blog which I came across when searching for a child’s crochet dress pattern. I wondered what kind of stuffing you use for toys as in the past I’ve watched mine seep out unless I line the crochet.
LikeLike
Hi, I just use stuffing from an old pillow… It never comes out!
LikeLike
These and the bunnies are so gorgeous! So glad I’m not working today because I want to go and start right now! Thanks for stopping by at mine – that’s how I found you!
LikeLike
So lovely! Thanks for sharing pattern.
LikeLike
It is very easy pattern (as all your patterns). I have crocheted this chick that you can see here: http://madametrico.canalblog.com/archives/2014/05/03/29755234.html
My son said that it is Penguin, but anyway it is cute… Thank you once again for your pattern.
LikeLike
Your turning me into a crochet freak! *grin*
Vicki
LikeLike
That’s the plan!!!
LikeLike
HOw adorable! Cant wait to make one 🙂 Thanks for the effort you put in giving us good clear pics. I struggle with patterns so thank you
LikeLiked by 1 person
Thank you, just love these and a wonderful happy way to use up the odds and ends. Thank you for sharing.
LikeLike
What a lovely pattern! My Easter chick turned out super cute and I can’t wait to see my grandma’s reaction when I give it to her.
LikeLike
This is such an amazing pattern. So cute, thank you ❤
LikeLike