Squeakers!
 Its finally here!!
How to make your own tiny, adorable crochet mouse… just in time for Christmas!
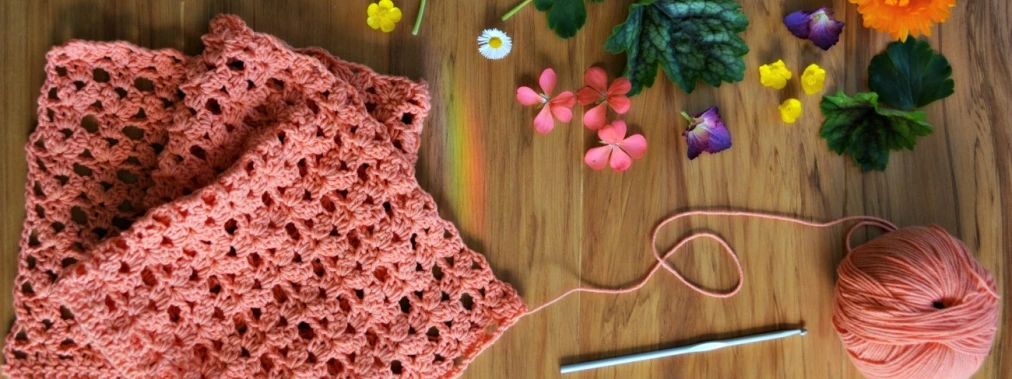
I found the best results with these mousies using 4ply sock yarn and a 2.5mm hook. I also made some with 3ply and a 2mm hook. I’ve yet to try this pattern with any heavier weight yarn, and I must admit I’m reluctant to, as I like the small size that the lighter weight yarn and small hook gives… I may well yet try one an even smaller mouse (squeakness… baby mice!)
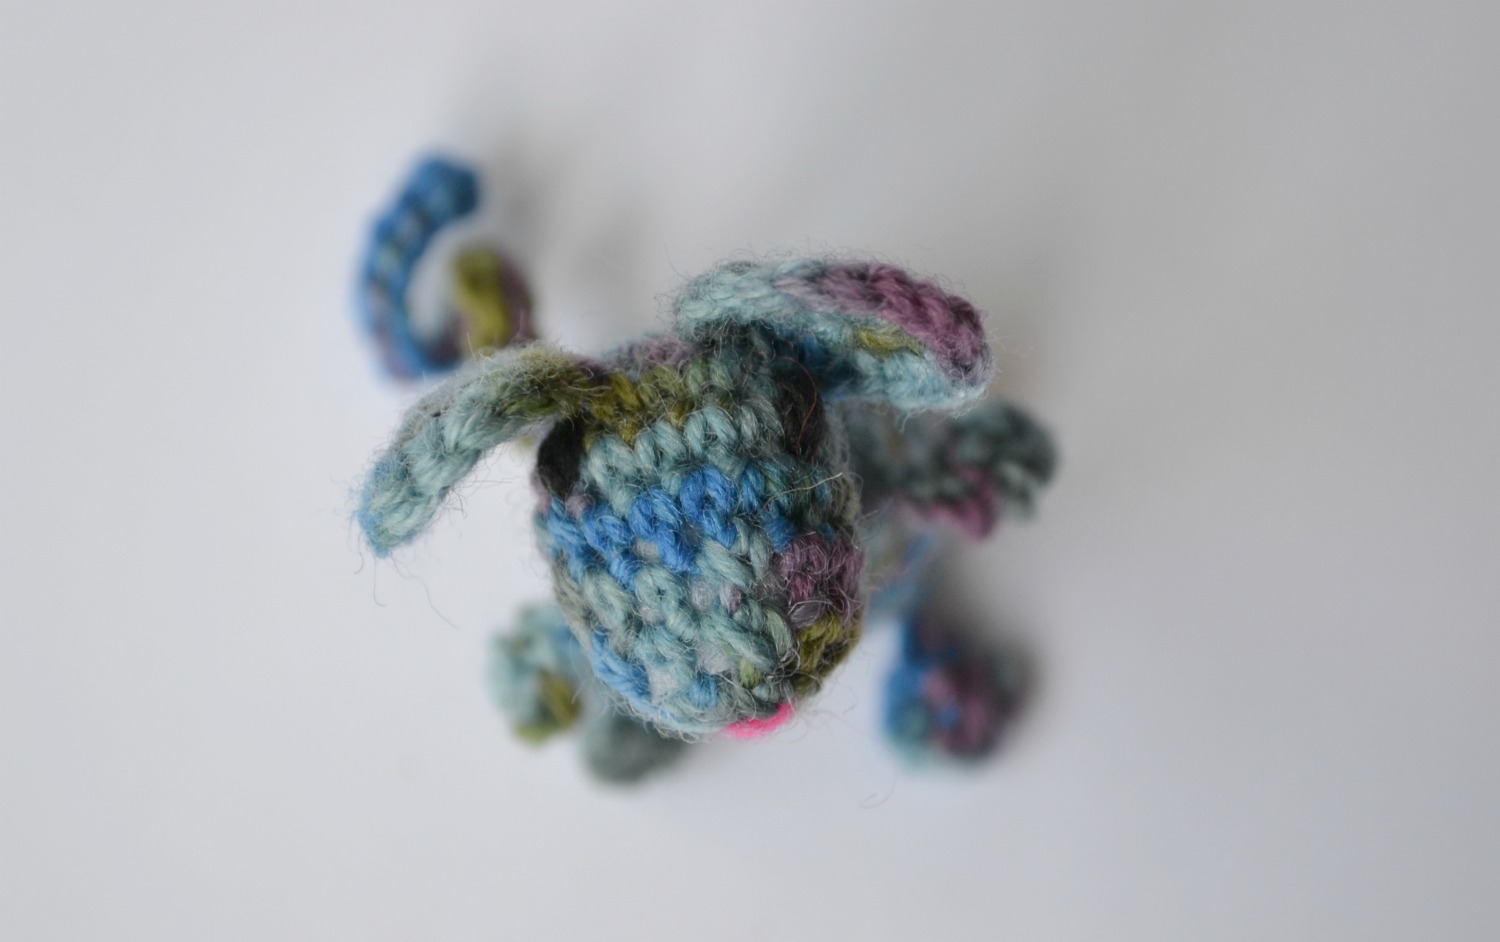
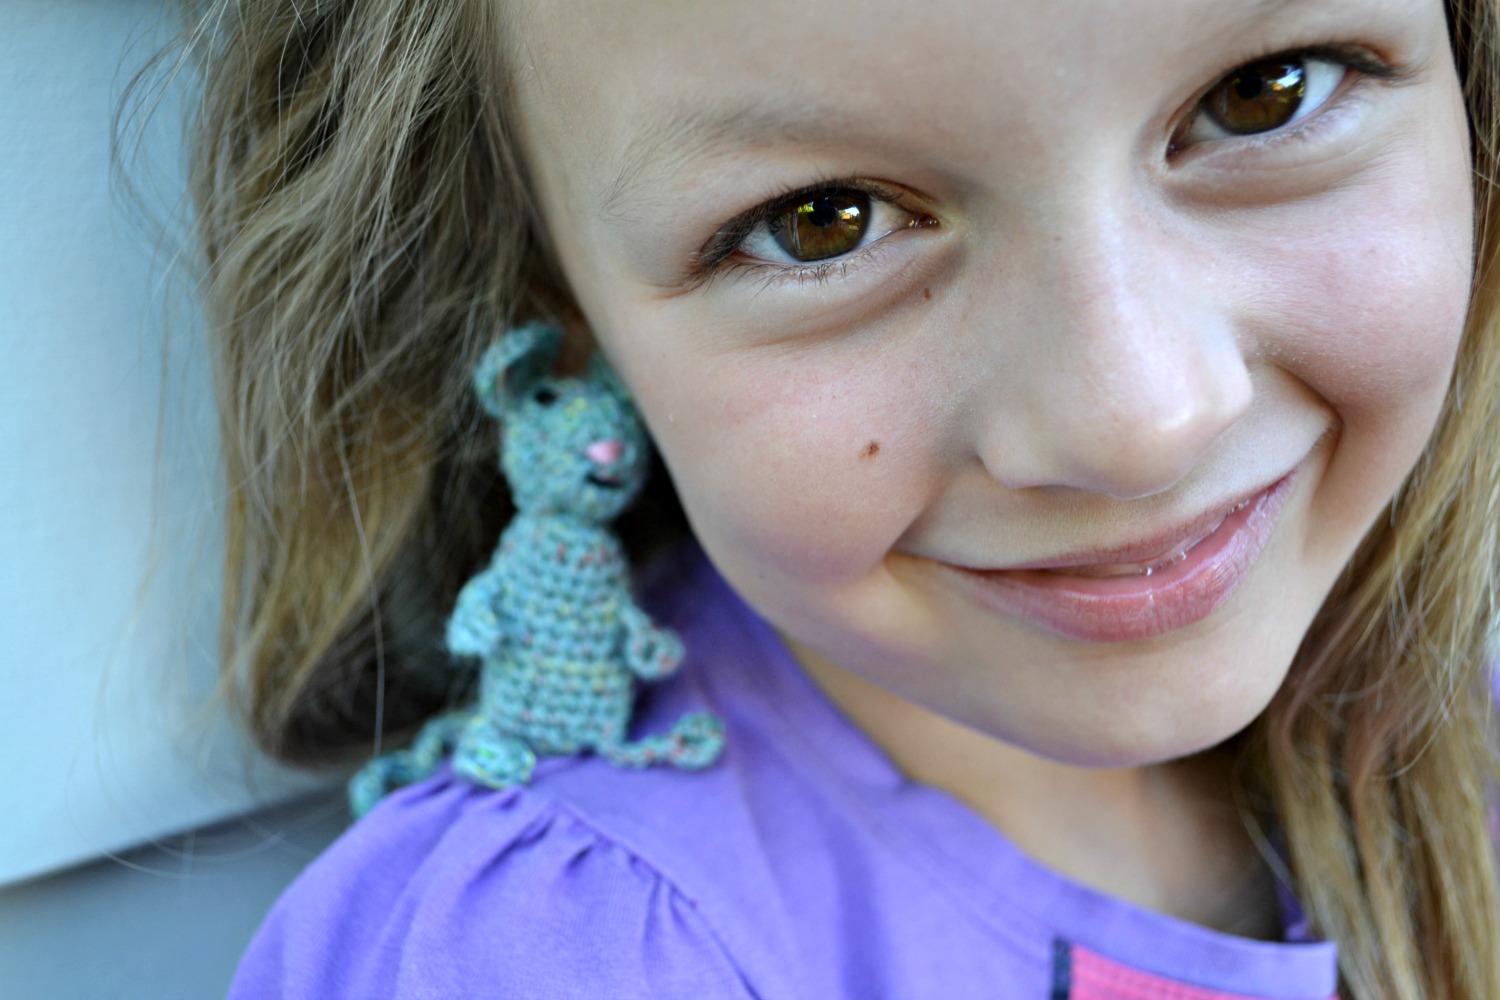
These mice are about 6-7cm tall (2.5 inches) and are perfect for small hands. Holding….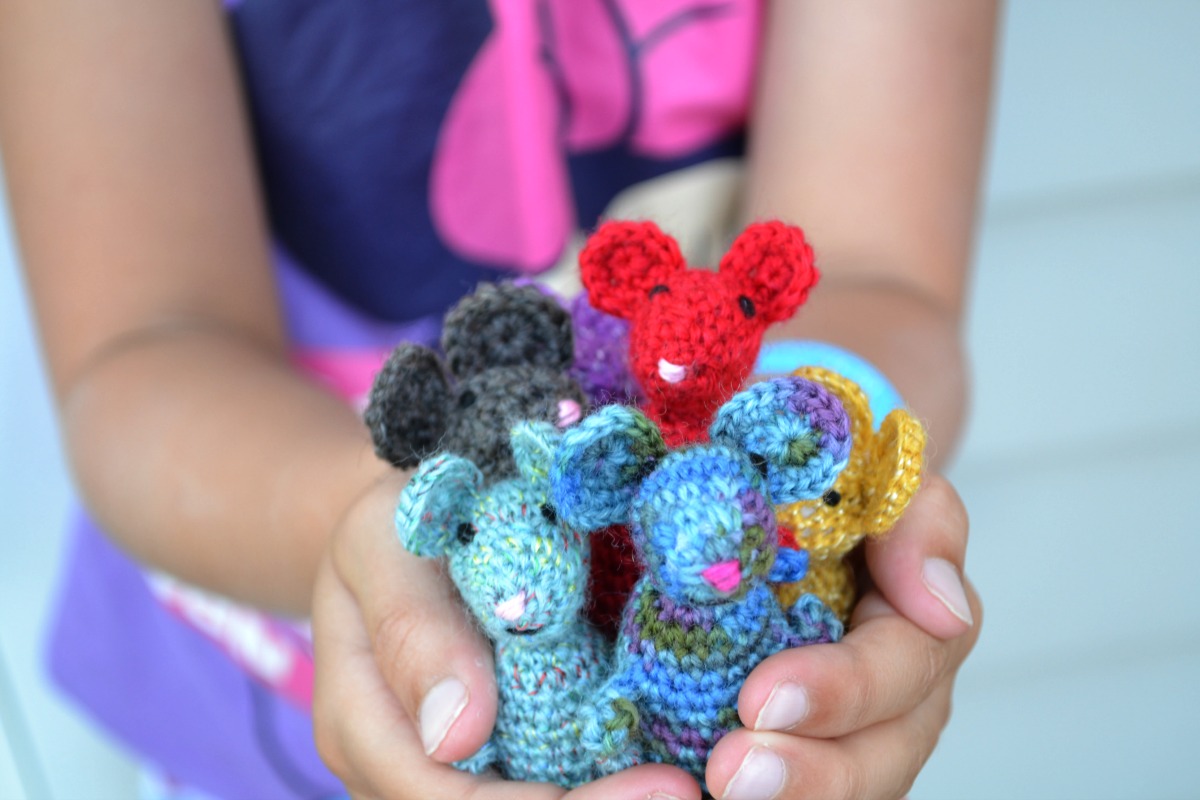 and loving♥…
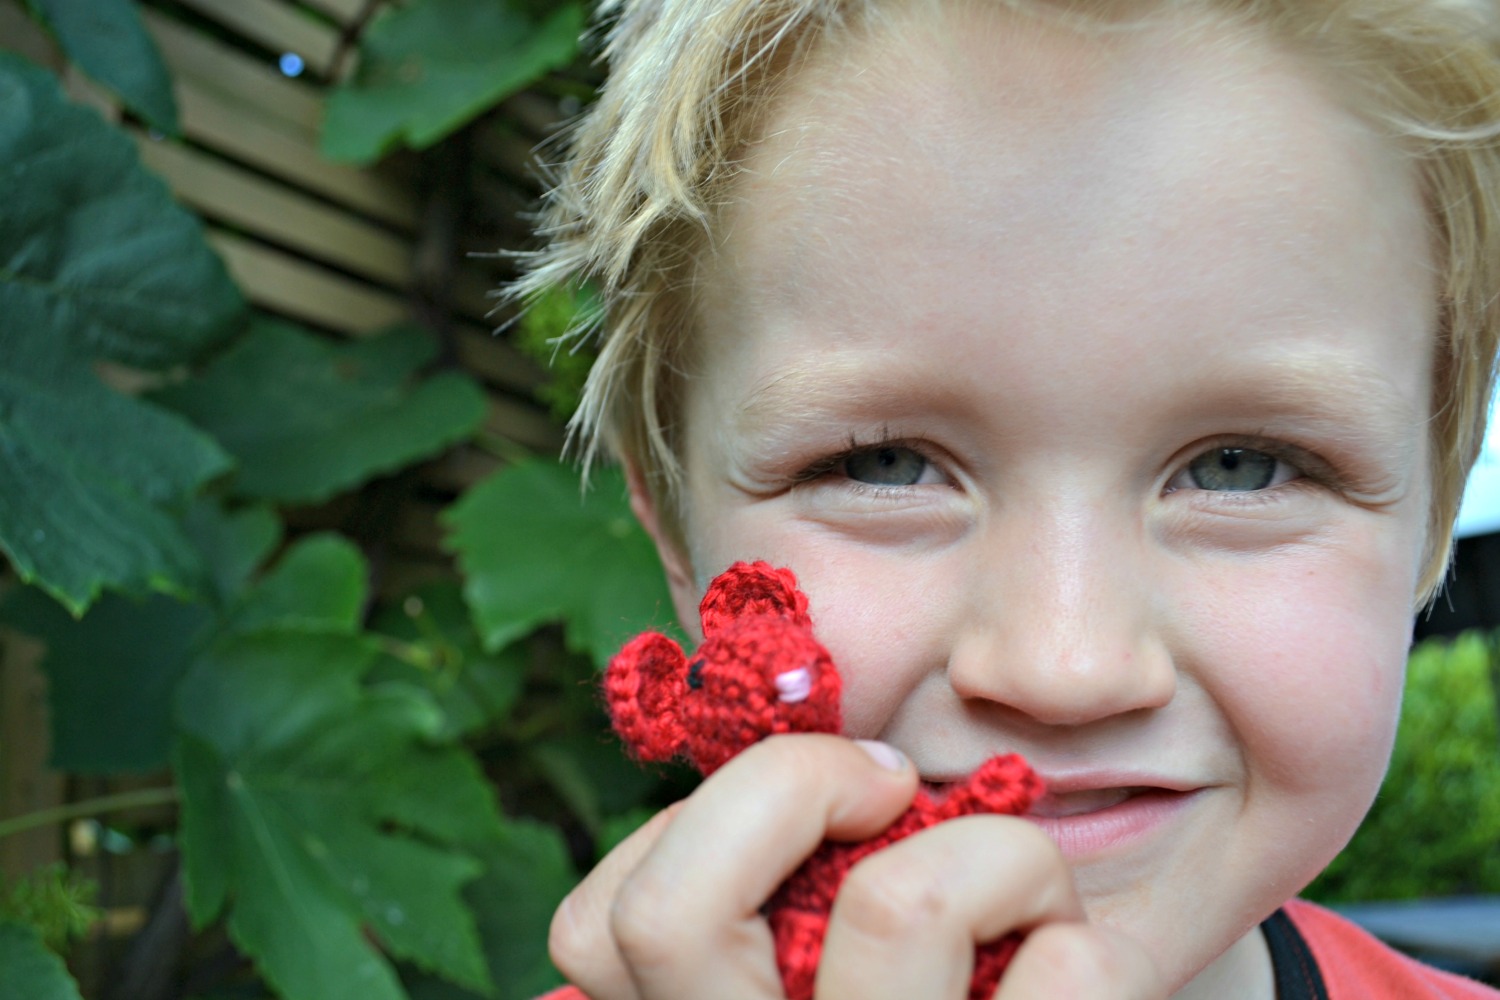 or even adventuring…
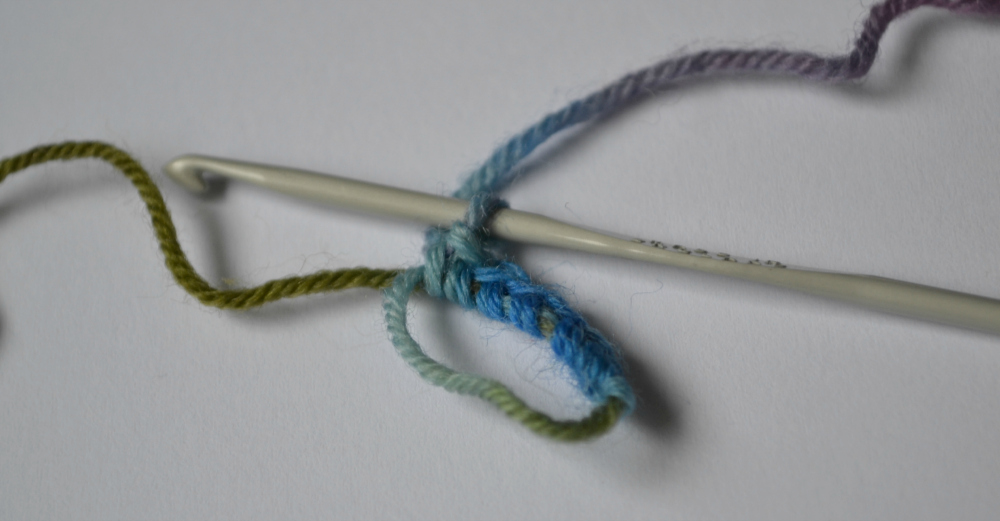
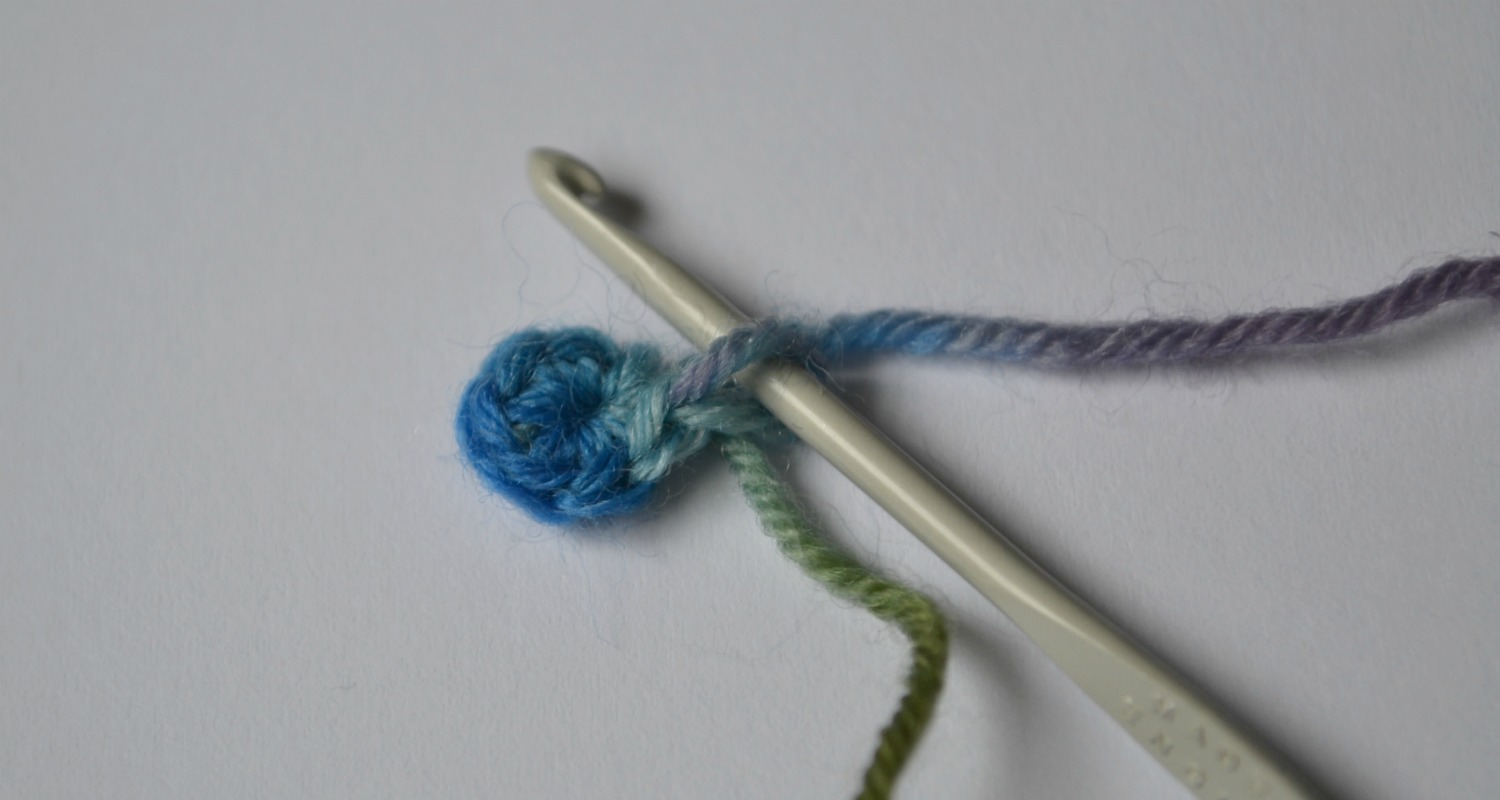
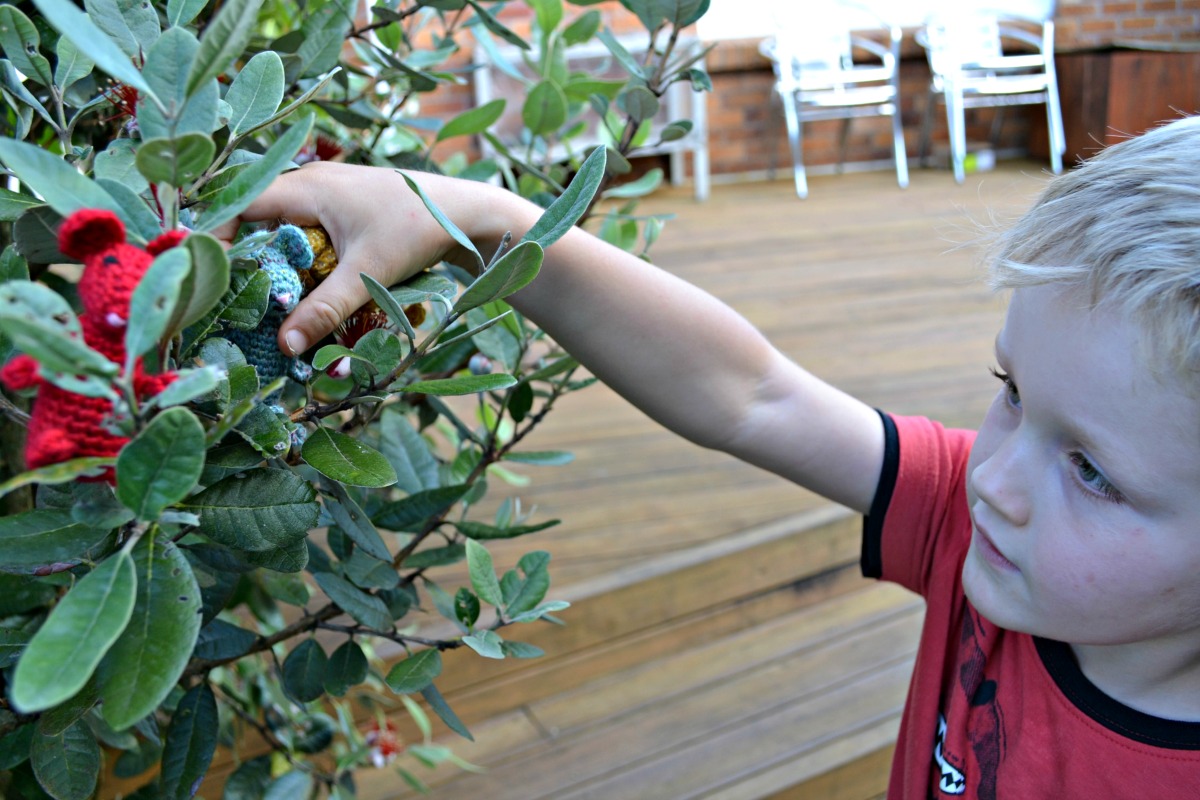 These cuties are made in four pieces- the body, with arms, legs and tail are crocheted all as one piece. Head and ears are crocheted separately and then sewn together. A clever little stitch called a 3 dc pop (or popcorn stitch) is used for hands and feet. It goes like this: Work 3 dc into third ch from hook, take hook out leaving loop, put hook through 1st dc & pull loop through. Hopefully the photos below will help this make sense!
Other stitches/abbreviations (all US crochet terms):
- ss = slip stitch
- sc = single crochet
- dc = double crochet
- st = stitch
- ch = chain
- Sc2tog = single crochet two together (decrease)
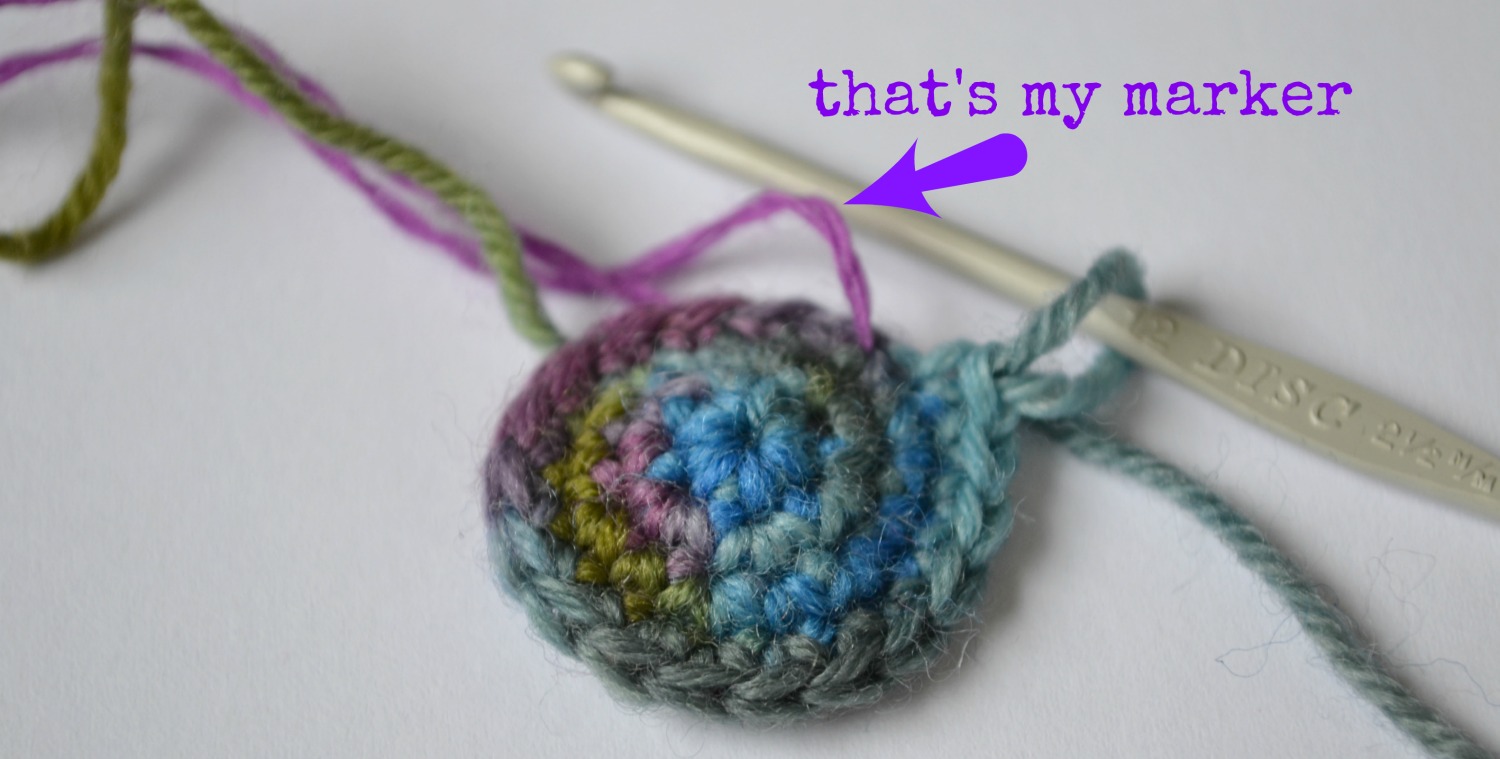
One other note, please use a marker to mark your rounds and keep track of where you are up to. And count your stitches at the end of each round. If you don’t, the arms and legs are less likely to match up.
I know some of you are going to go ahead and not use a marker. If you lose your place or end up a stitch or two out you can always eyeball it – just remember to make sure your legs are in the same stitch on the round as your arms (so they line up)!Lets begin….
First up we are going to make the body:
Round 1: Make a magic circle ch 1 and work 6 sc;
 Pull tight – 6 st.
 Round 2: 2 sc in each st around – 12 st.
 Round 3: [2 sc in next st, sc in next st] repeat around – 18 st.
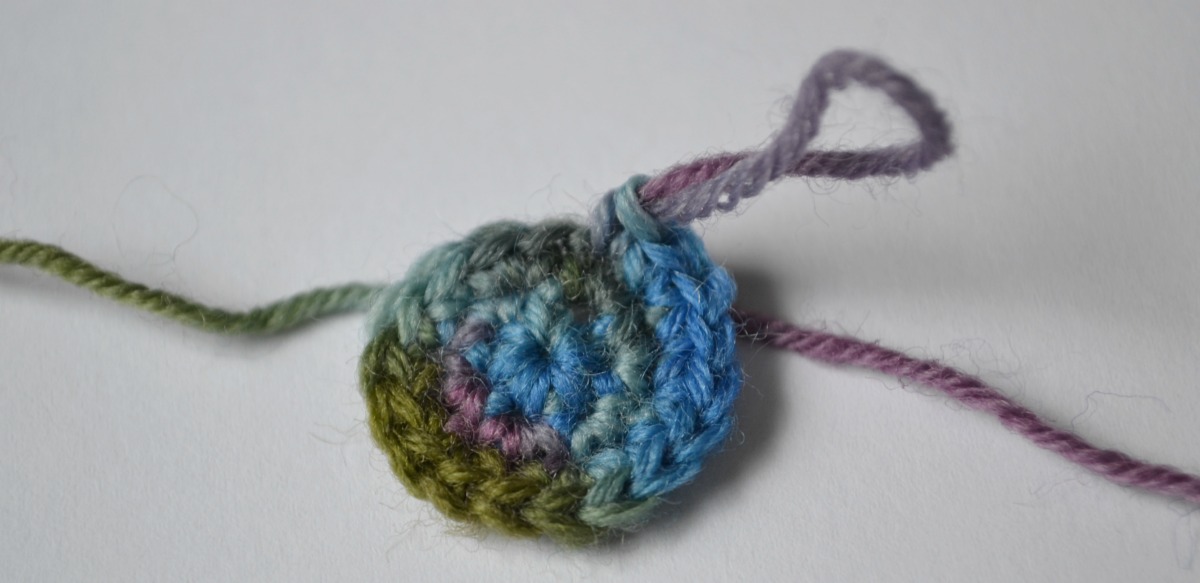 Round 4: Sc in each st around – 18 st.
 Round 5: Sc in next 6 st, [arm: ss into next st, ch 6,
 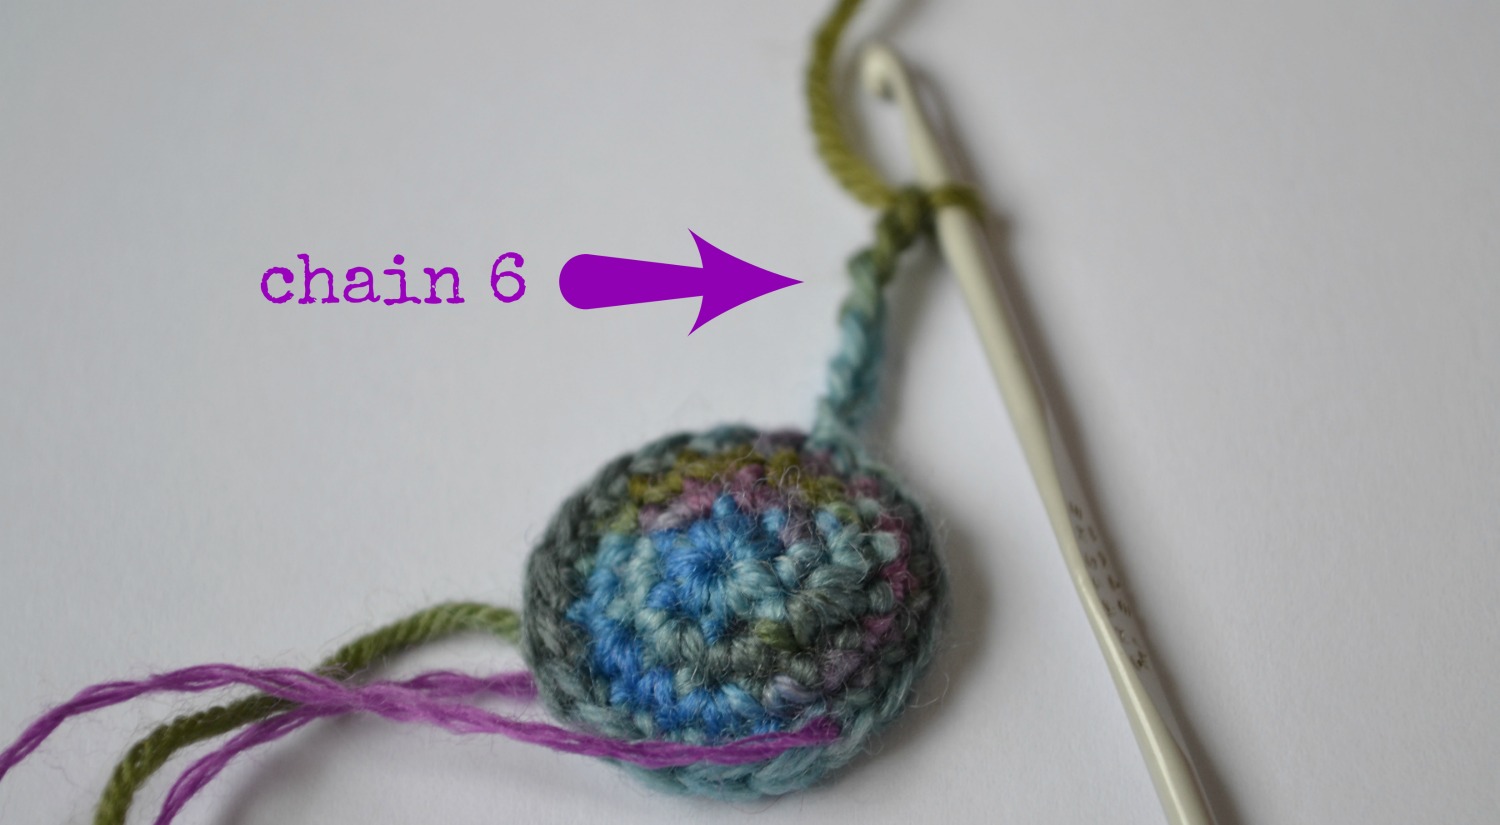 …3dc pop into 3rd ch from hook,
  …ss into next 3 ch, ss back into original st],
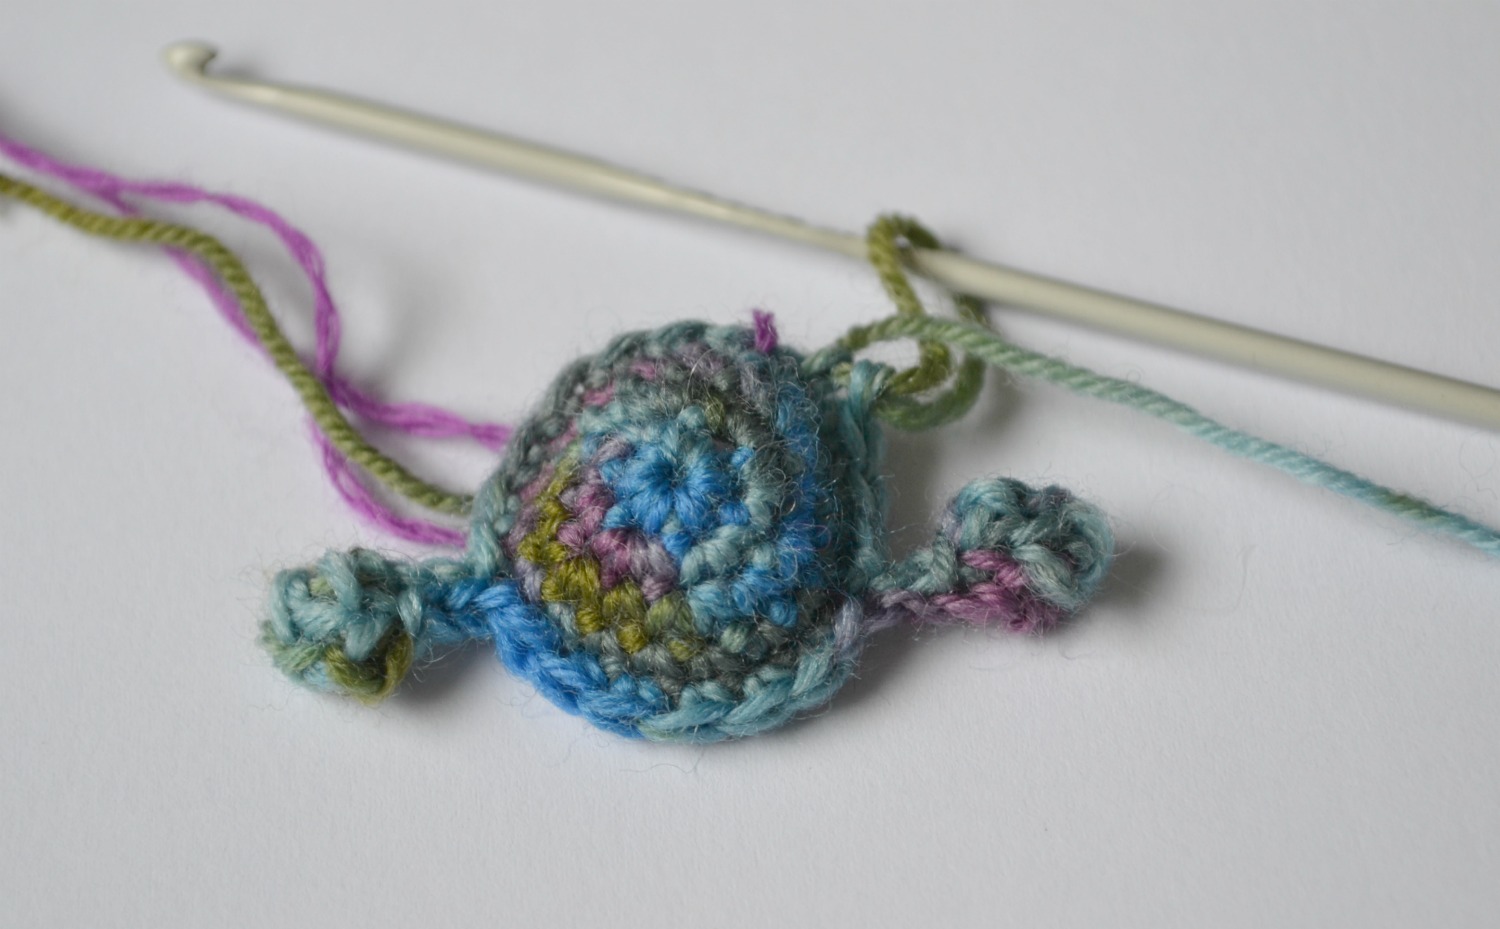
 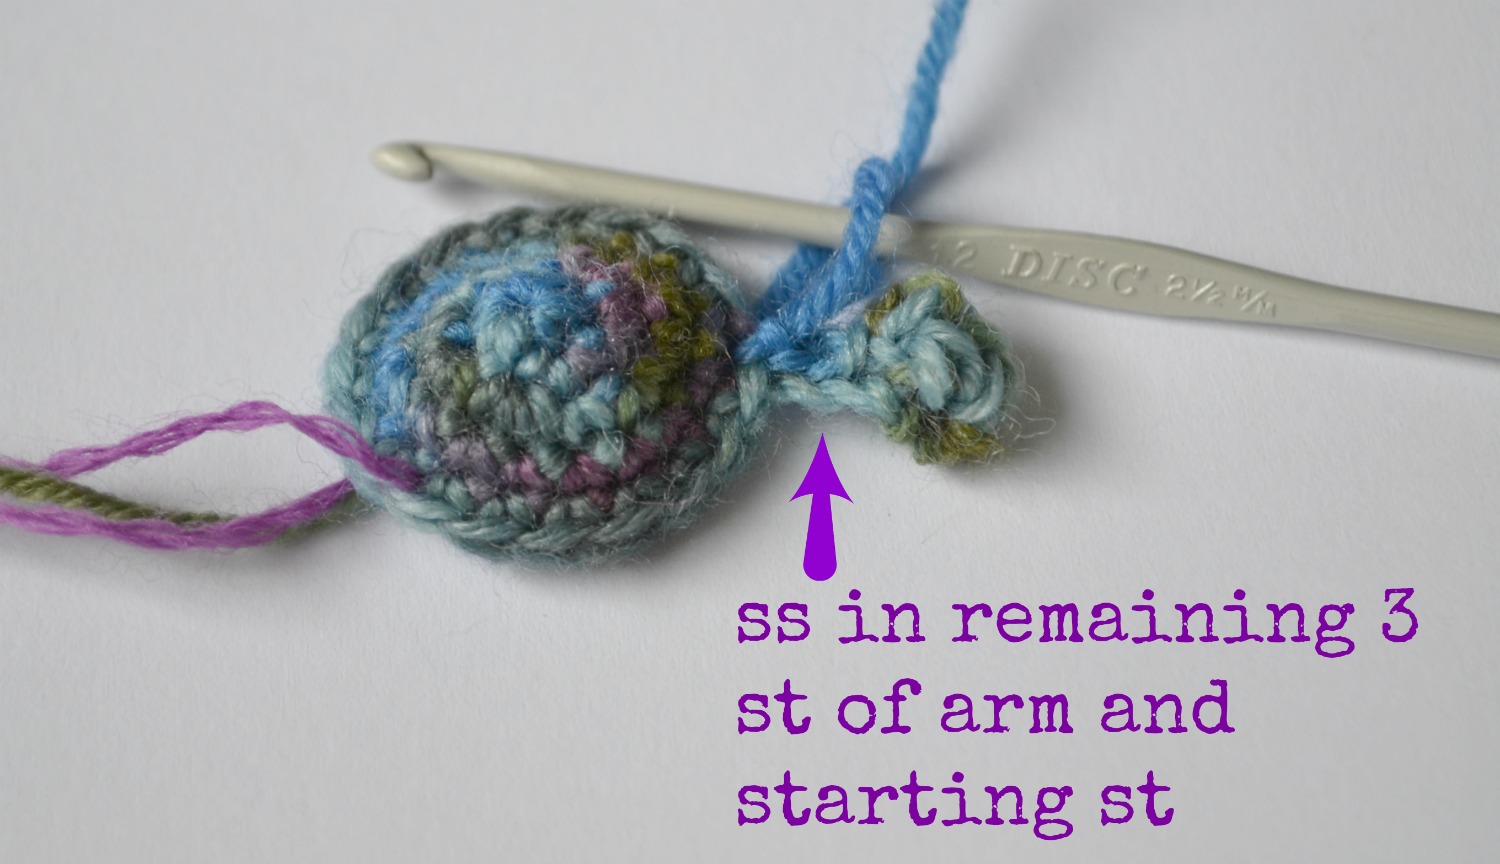 …sc in next 6 st, [arm], sc in next 4 st – 18 st.
 Round 6 – 11: Sc in each st around – 18 st.
 Round 12: Sc in next 8 st. [leg: ss into next st, ch 8,
 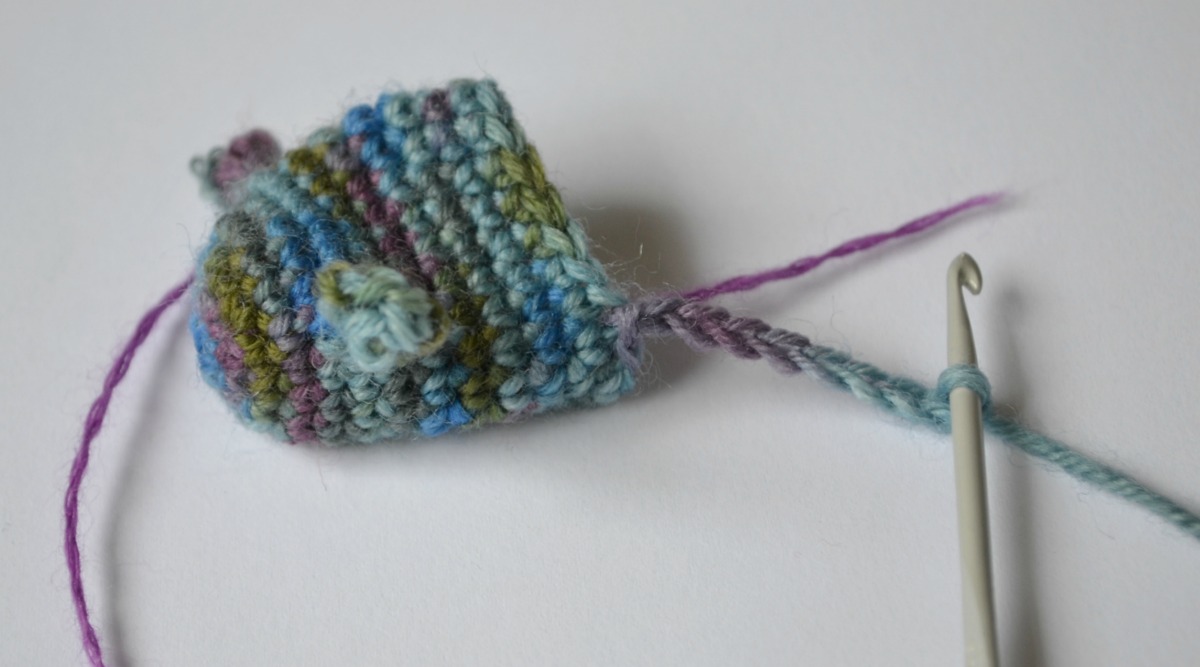 3dc pop into 3rd ch from hook, ss into next 5, ss back into original st],
 sc in next 6 st, [leg], sc in next 2 st (18)
 Round 13: Sc2tog, sc in next st, ss into next st, [tail: ch 22, ss into second ch from hook and each st, back into original st]
 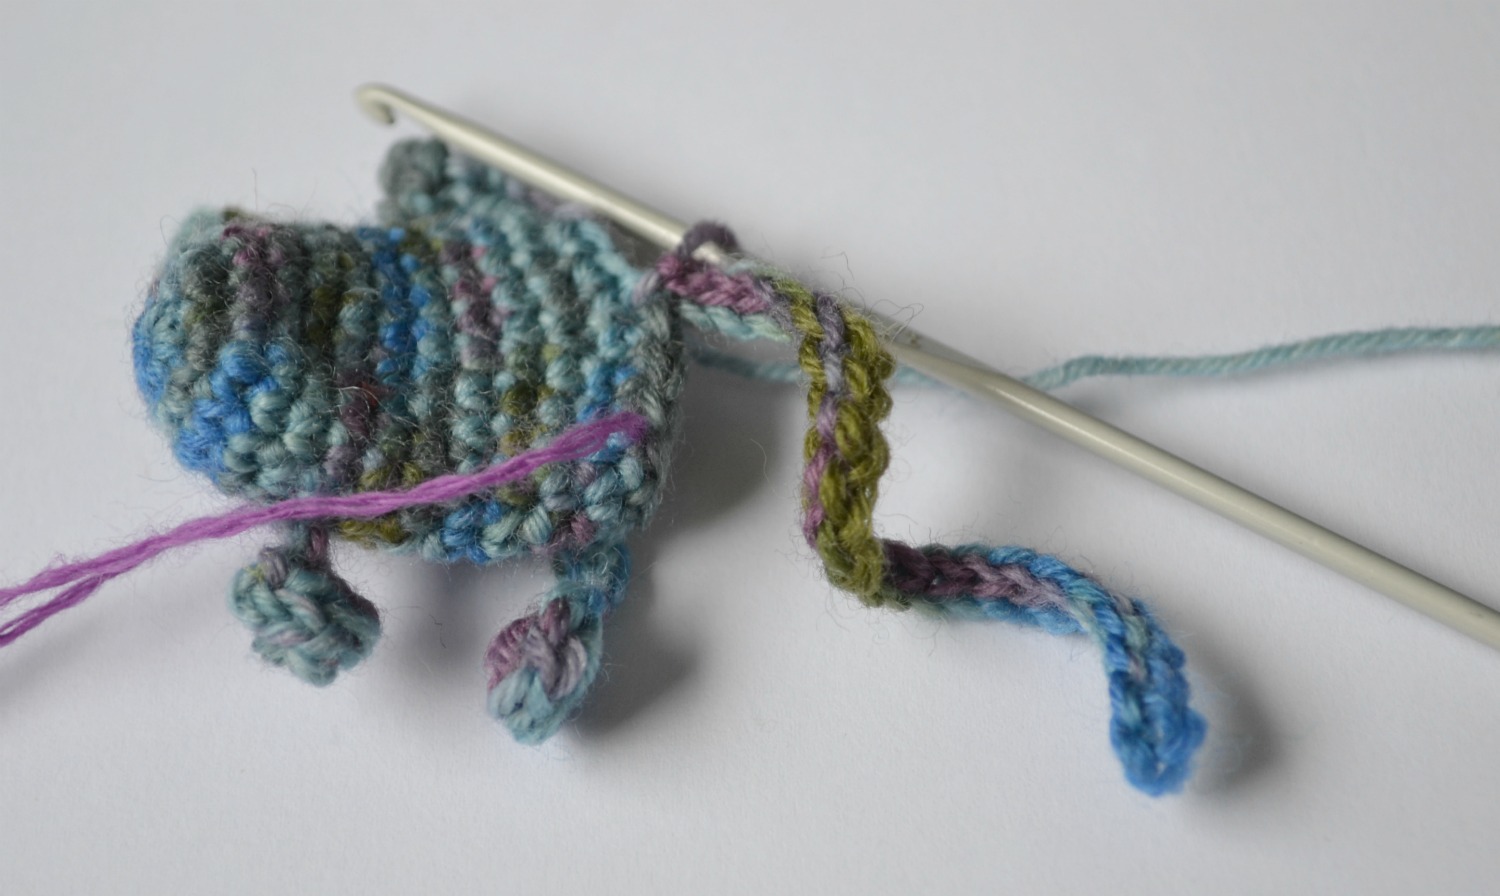 sc2tog, sc in next st, sc2tog, sc in next st, sc2tog, sc in next st, sc2tog (12)
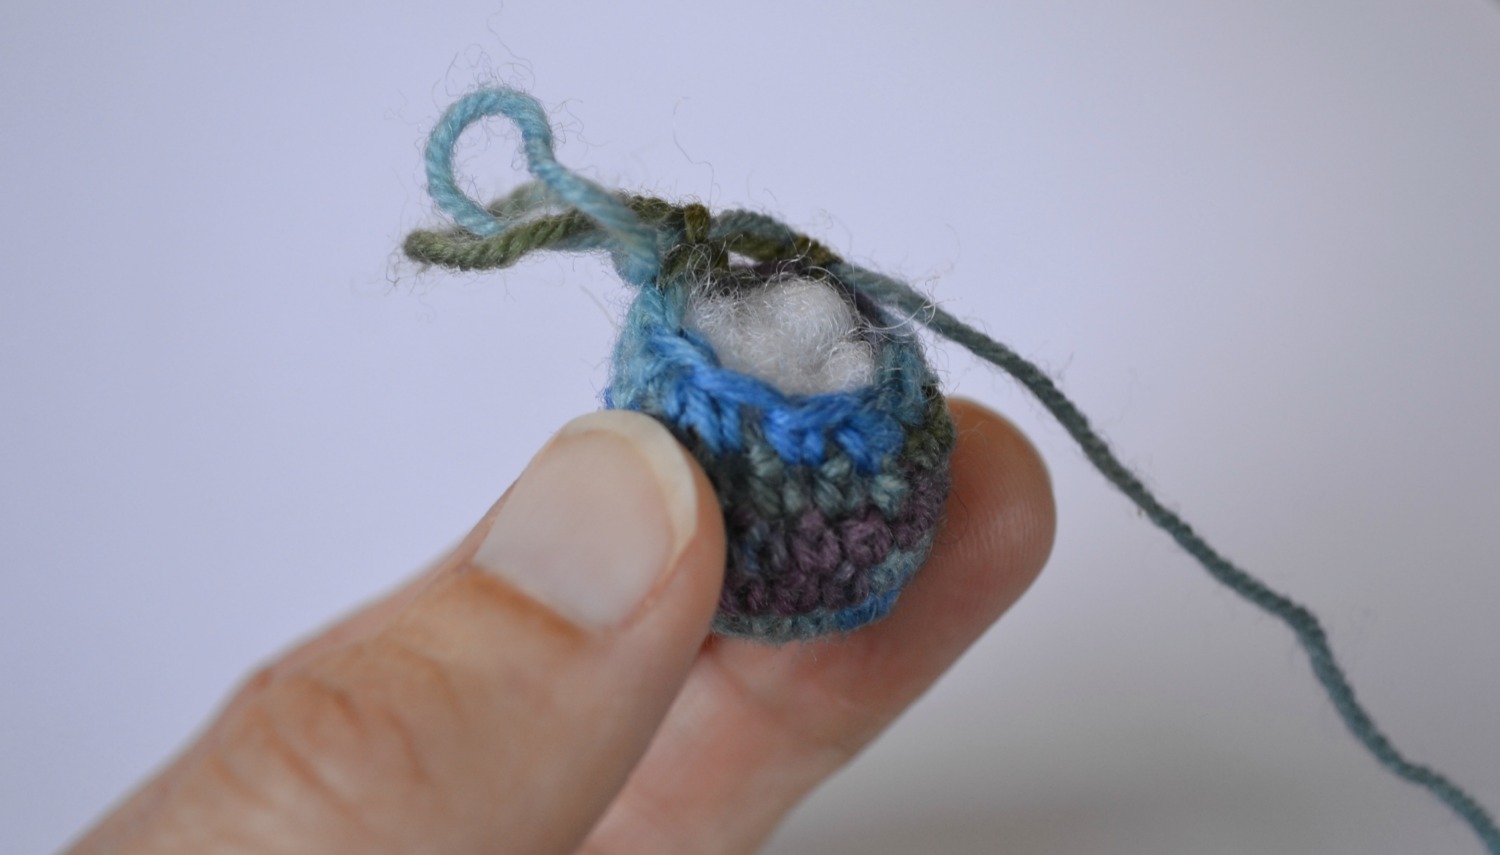
 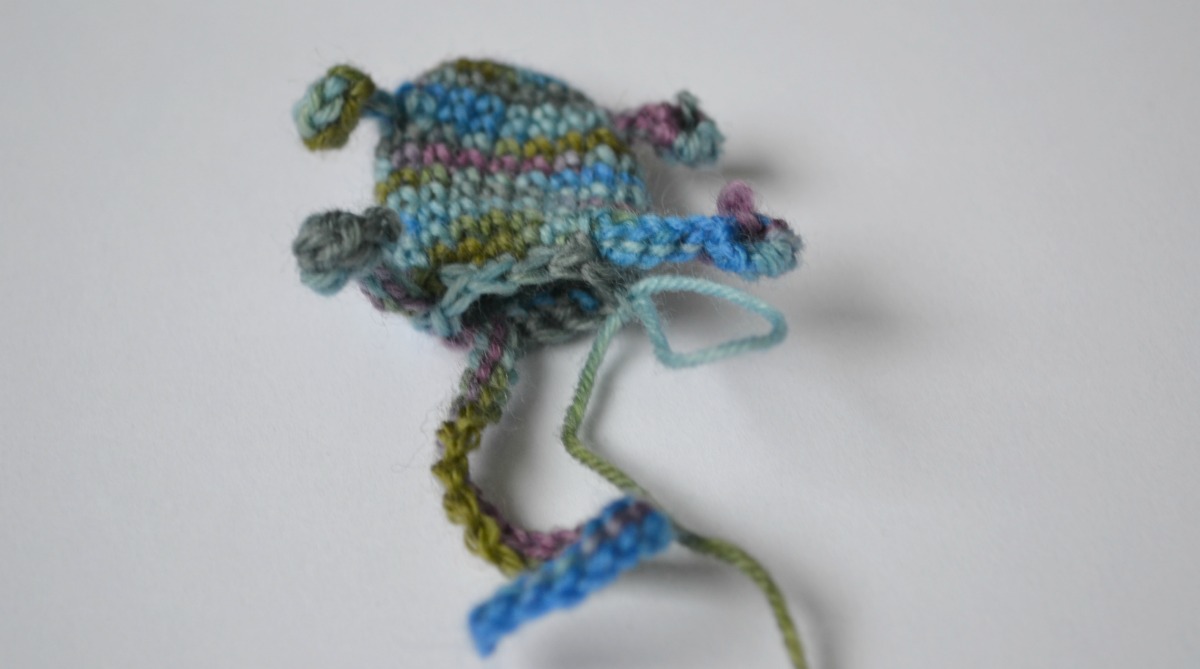 At this point you are going to stuff your wee mousie…
  Round 14: Once you have stuffed it, sc 2tog until hole is closed. Fasten off leaving long end, sew in ends and securely close hole.
Head:
Round 1: Make a magic circle ch 1 and work 6 sc into mc – 6 st.
Round 2: 2 sc in each st around – 12 st.
Round 3: [2 sc in next st, sc in next st] repeat around – 18 st.
Round 4-5: Sc in each st around – 18 st.
Round 6: Sc2tog, sc in next 2x 4, Scin last 2 – 14 st.
Round 7: Sc2tog, sc in next st x4, Sc2tog – 9st. Stuff as much as possible.
 Round 8: Sc2tog, sc in next st x4, ss into next st and FO leaving a long end.
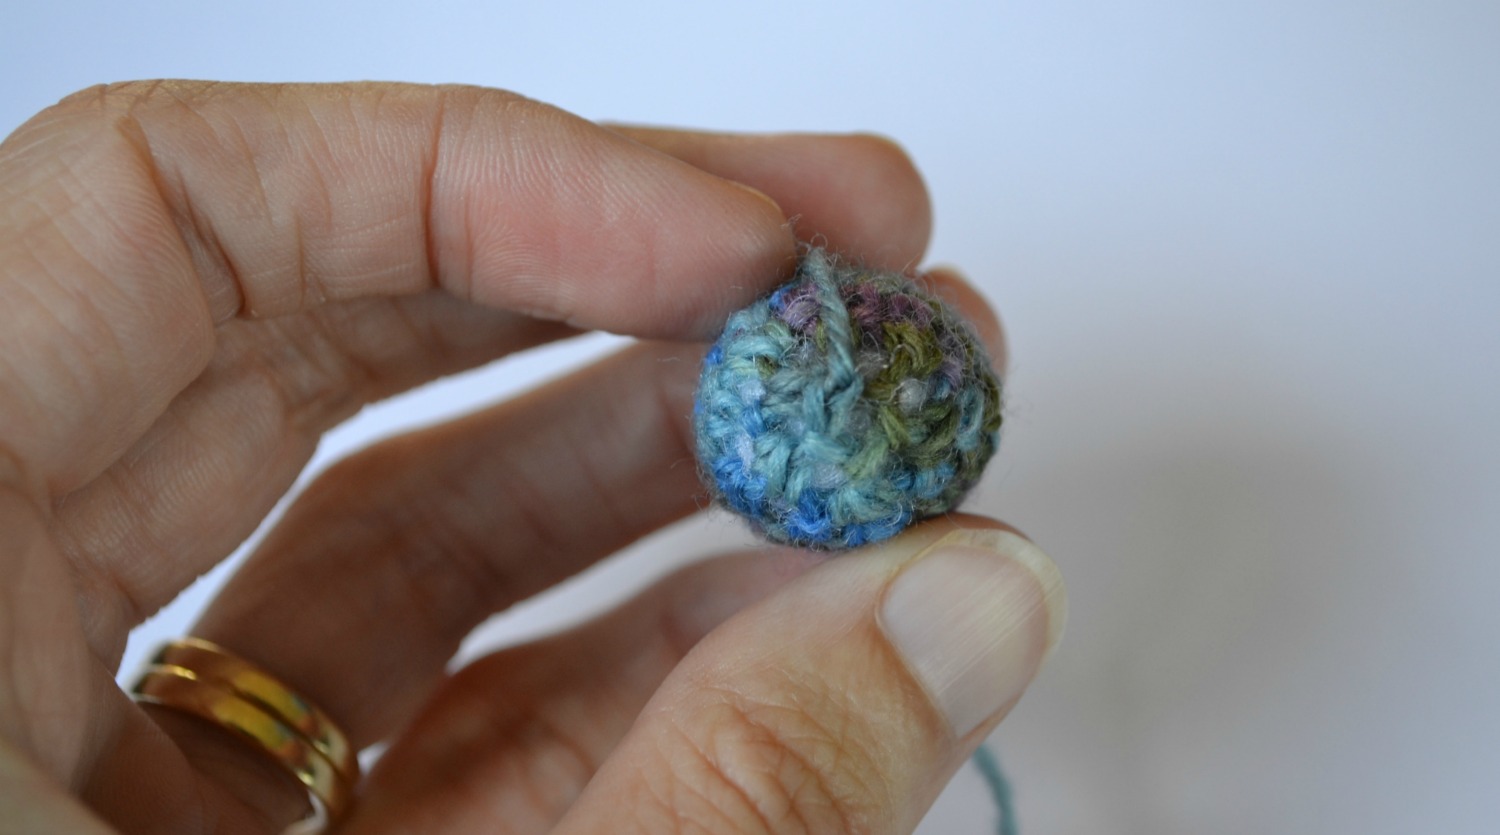 Sew head onto body…
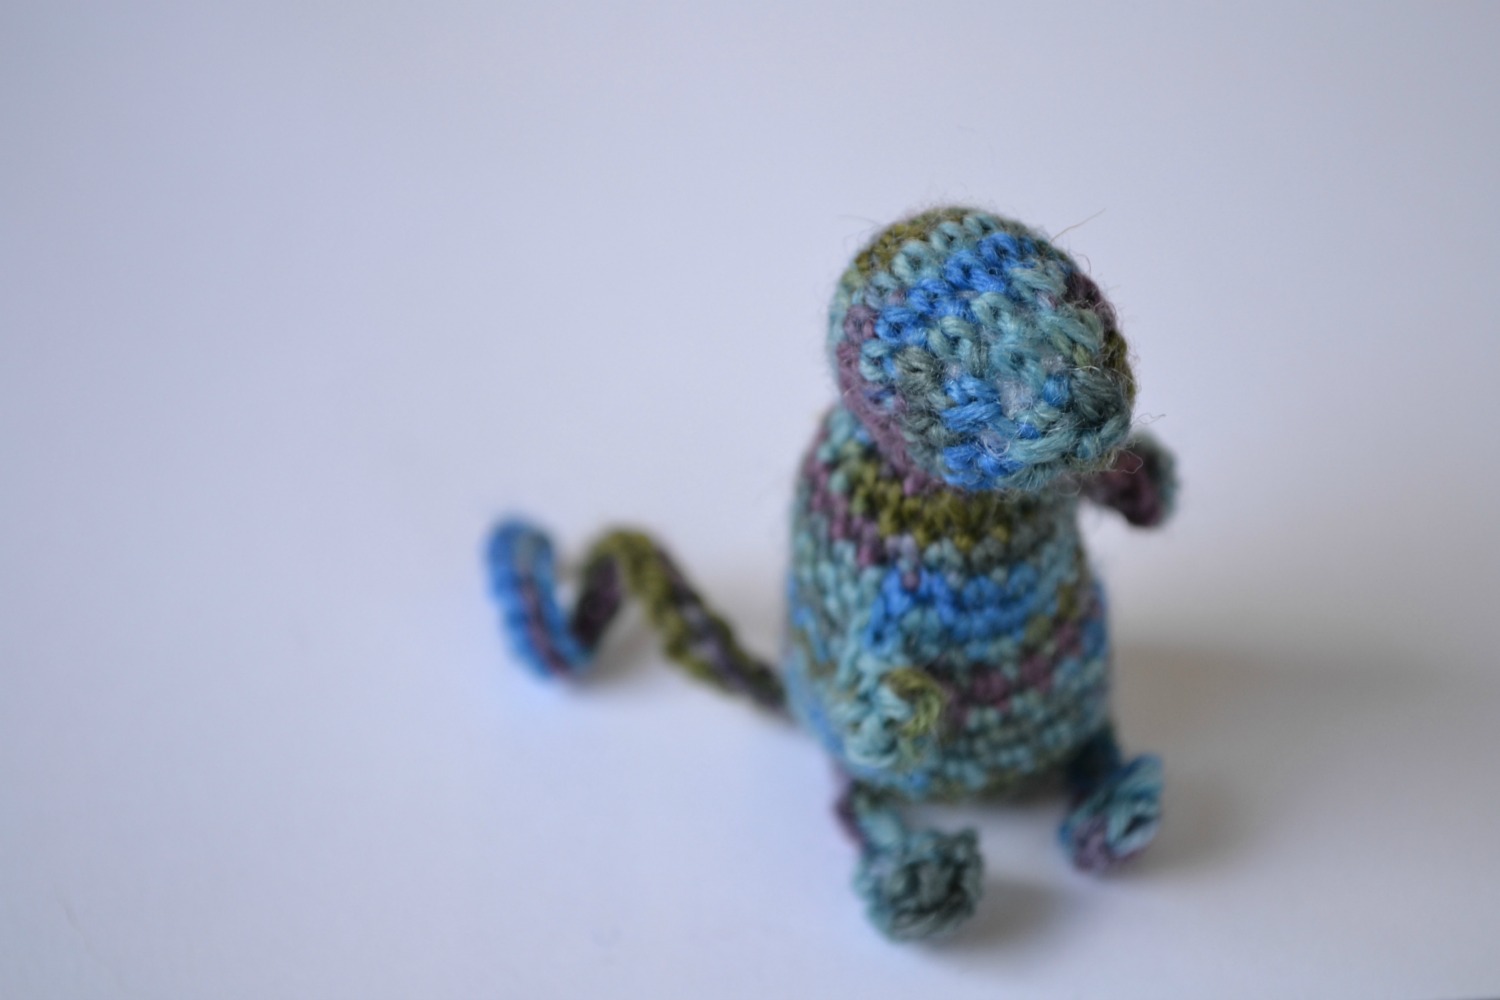
Ears:
Round 1: Magic circle, ch1 and 8 sc in circle. Pull tight, do not join. 2sc in each st around, ss into next st. Fasten off and leave long end… 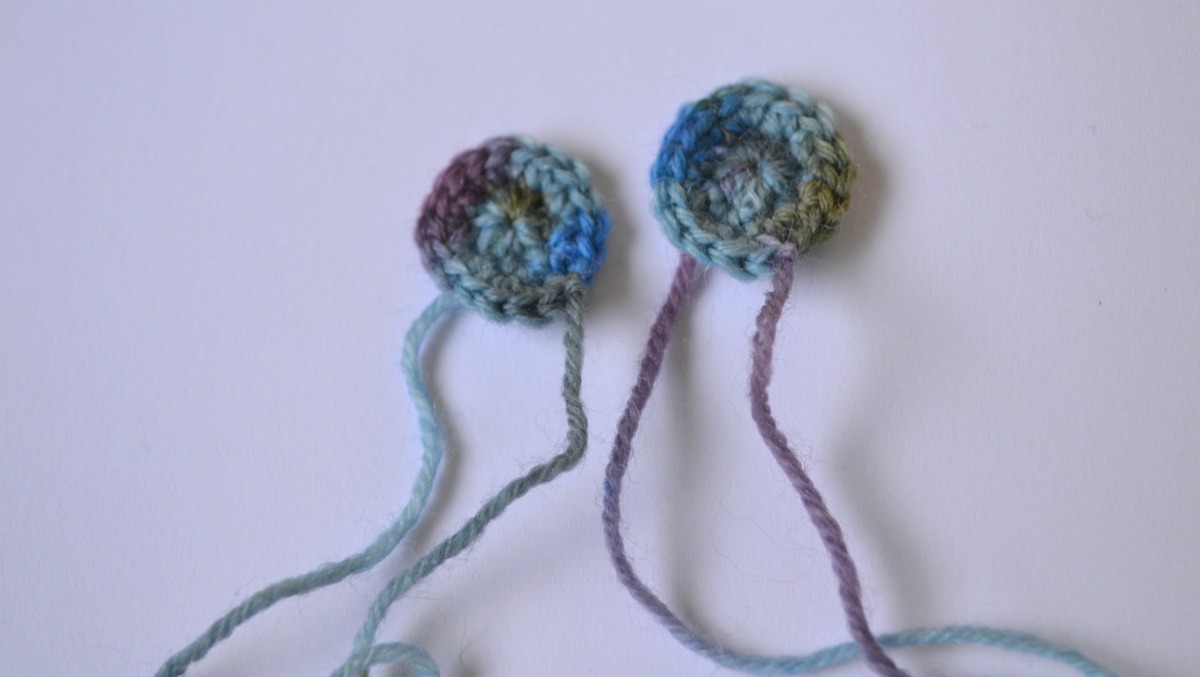 Sew in ends, then sew ears to head.
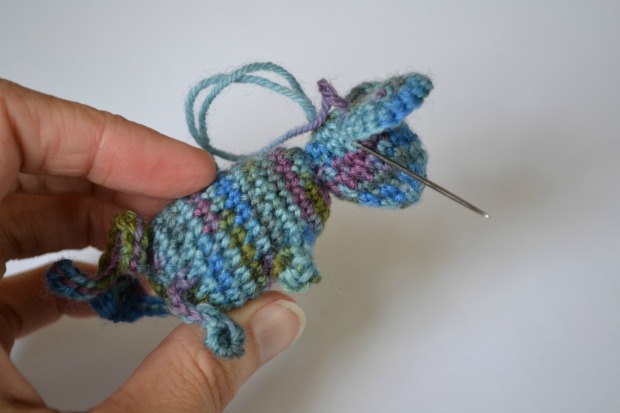 Sew face in place… no real instructions here, just use your imagination. I like mousies with a pink nose and black 8ply yarn for the eyes and a tiny mouth. I tried a french knot for eyes but actually just like eyes which are a tiny stitch or two in the right spot. The face gives each one an individual personality 🙂
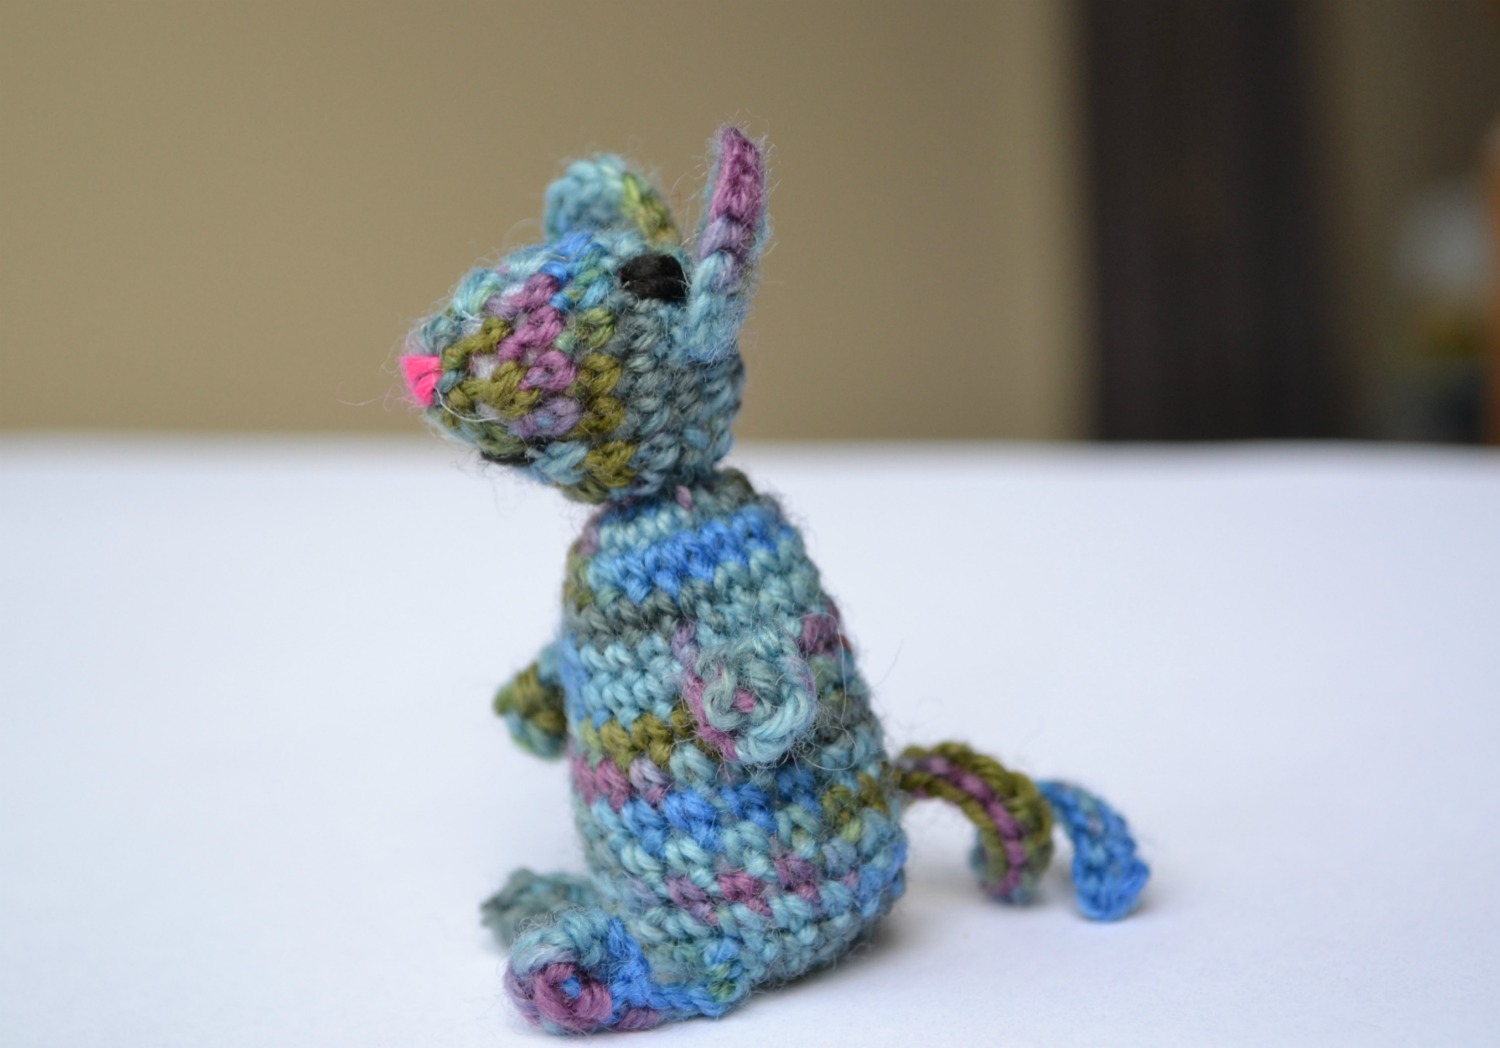
 Enjoy your new wee friend!
 But be careful… they’re addictive and before you know it they multiply… like… well… mice!
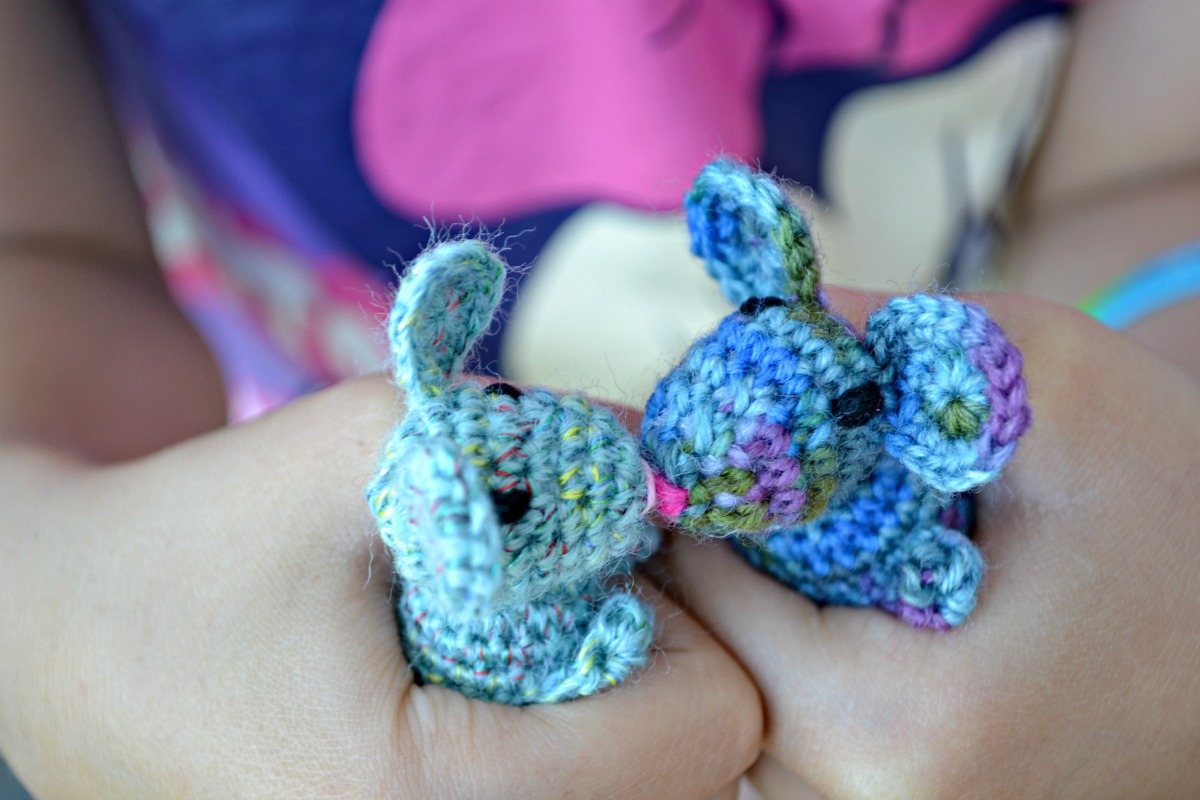 I hope you enjoy making these mousies as much as I do! If you do give them a try, Id love to see how they turn out so send me a pic. If you notice any errors in the pattern, please let me know!
Edit to add: Find a Christmas hat and scarf for your mousie here.
And you can find out how to make a cute mouse bed, here.

I am the first of many to “like” these adorable mousies!! I love them! I may not be the first to make one first but I will be the first to get the pattern and put them in first place on my “to make” list.
Your children obviously did a first rate job helping and make sure you tell them that this pattern will spread a lot of Christmas magic and so have they! Well done getting the pattern out at such a busy time of year. Very generous of your family! 🙂
LikeLike
They are so cute. The first thought I had when I heard sock yarn, is that I would like to hide these throughout my sock (and other) draws so that I would come across them when rummaging through. I imagine it would give me a laugh when I came across them.
Wonderful tutorial.
LikeLike
so so cute!
LikeLike
Oh, I can’t wait to have a go at one of my own! For me, the cuteness starts with the pair of arms 🙂
LikeLike
Oh my goodness!!! My kids are going to love these little guys! Hopefully I’ll have time to make some as stocking stuffers this year. I’ll send pictures for sure if I do! Thank you for this amazing tutorial 🙂 Love your blog!
LikeLike
I love these. They make me think of the ‘rats’ in the Muppet movies, particularly The Muppets Treasure Island when they are dancing.
LikeLike
Une Énorme Merci ! C’est trop mignon. Forrest, our cat, will love them…..
LikeLike
Awesome and easy to make, thanks for sharing.- Sharon
LikeLike
How totally gorgeous! And what a genius way of creating the arms, legs and tail! Thank you for another great tutorial. Yvonne x
LikeLike
Just the cutest thing ever!!! At last a project for using up those leftover bits of scok yarn!
LikeLike
The popcorn stitch is so clever! I’m going to have to try it! It’ll come in handy not to have to crochet the limbs and tail separately!
LikeLike
Me encantan!!!!…ojalá me resulte tejer unos ratoncitos así de lindos para mis hijas esta Navidad. Muchas gracias por compartir este tutorial. Un abrazo.
LikeLike
Very cute mousies:) Thanks for sharing your pattern!
LikeLike
Going to start one today. Thank you.
LikeLike
I love these! I have the perfect sock yarn to make with these! 🙂
LikeLike
You are so kind to share this adorable idea with us. Thank-you and may the blessings return to you multiplied, pressed down, shaken together and running over! 🙂
LikeLike
I have been searching and searching for the perfect mouse pattern and have been anxiously waiting for this! THANK YOU SOOOOO MUCH!!!!! And as Brenda said, may the blessings return to you multiplied, pressed down, shaken together and running over!
LikeLike
What a clever way with the limbs and tail! Not too many pieces to sew together!
LikeLike
Reblogged this on A Random Harvest and commented:
Another cute Christmas crochet pattern . . . ~ Linne
LikeLike
like the fact that there aren’t many bits to sew…on my ‘to do’ list and will send you a pic when I do.
LikeLike
They are soooooo cute!!!! I love them!
Thank you for share
LikeLike
These are so cute, I think I will save this pattern to make for Easter gifts as I have my hands full with the items I need to finish before Christmas.
LikeLike
Ladies, your kindness overwhelms me! Thank you for all of your lovely messages xoxo
LikeLike
aw they are so cute! What a lovely pattern, thank you for sharing it 🙂
LikeLike
They really are too cute.
LikeLike
Cute crochet- the best kind 🙂
LikeLike
Just to tell you that the pattern of the Drops advent calendar is today a mouse too but a bigger one, less cute then ours http://www.garnstudio.com/julekalender.php?lang=us
LikeLike
I’ve never seen that drops advent calendar before… Great idea (but I do think my mouse is cuter… Might be biased though!!) xox
>
LikeLike
I just made this little mouse! It’s so cute and easy. I just have to put the eyes on it and I think I will use some large seed beads for them. Thanks for posting this pattern!
LikeLike
So cute ! Thank you for the tuto !
LikeLike
I’ve been making mousies all day long. Thank you for such a fun pattern!
LikeLike
Yay, Im so glad you like them!!! xx
LikeLike
I love the mouse, here is how mine turned out: http://minlillehandarbeidsblogg.blogspot.no/2014/01/oppskrifts-tips.html
LikeLike
They are fabulous, I love the santa and Mrs Claus outfits- adorable!!
LikeLike
Thank you for your generosity Janett!
Here is my blog post about your tutorial: http://cukipok.blogspot.ro/2014/01/mice-party.html
Happy New Year and blessigns!
LikeLike
Thanks fir sharing! Your mousies are very cute… Especially the little bow tie!! Happy New Year to you too! Janette xx
>
LikeLike
Hello! The mouse is absolutely lovely, thank you so much for sharing from Germany :)!
I could use some help though with the head part: i don’t understand the head pattern starting in round 6. sc2tog, sc. in next 2x 4, sc. in last 2 – 14 st. It never get’s me there… Can you help me out?
LikeLike
Hi so it goes like this;
Round 6: single crochet two together and then single crochet in the next two… Repeat this four times. When you have done the four times you will have two stitches in the round left… So then single crochet in the last two stitches. You should have 14 stitches. Hope that helps! Janette xx
s
LikeLike
Hello, I’m just discovered your lovely blog … there was a current link on http://busybeefree.blogspot.de/ which braught me to here! HOW CUTE THESE LITTLE MICE ARE!!! And thank you a lot for your lovely and detailed tutorial. I think I will do it & make some as X-mas gifts this year!!!
LikeLiked by 1 person
Thanks so much! Im so glad you liked them 🙂
LikeLike
I really love these mice! The tutorial is really nice but I do wish that there was a video to watch these be made.
LikeLiked by 1 person
I love your mice, but am having problems getting the shape of the head right. Mine always come out looking very round, not elongated with a pointy snout. I have tried everything – to no avail! Can you advise. This is also the best pattern I have come across for crochet mice as you don’t have to crochet the limbs separately. Thanks for making the pattern available. In the meantime, help !!
LikeLiked by 1 person
I love this pattern and it’s my first time reading one and doing it because it seemed easy enough after learning through video tutorials. Only I keep coming up wrong with the mouse head. I’m assuming I am reading something wrong because the head does not close the way I’m doing it and doesn’t look right. If I could have just a little clarification of the Head instructions I’d appreciate it! ❤ This is how I'm reading the last line for example:
It says:
Sc2tog, sc in next st x4, ss into next st and FO leaving a long end.
That to me means go into stitch; pull a loop, go into next stitch and pull a loop through all 3. Single stitch in the next stitch 4 times? Then slip stitch in the next stitch and fasten off….
Right? Or is that single stitch…in 4 stitches. Thank you!
LikeLike
Hi, almost right… It’s sc 2 together then sc in next stitch and repeat these two things four times, then SS in the last stitch. Your hole should be pretty much closed when you are finished. Hope that helps!
LikeLike
This mousie pattern is one of the best amigurumi patterns on the internet! ❤
LikeLiked by 1 person
Thank you x 🙂
LikeLike
Hi janette,
Love your tutorial on these cute little fellas! However, could you please explain how to stitch around the arms ? I am not a seasoned crocheter so don’t quite understand. Thankful to people like you who write such lovely tutorials that one can self teach this age old technique of making beautiful things with a yarn and needle!
Many thanks once again!
Best,
Jo
LikeLike
Loved the pattern with the pics. (That helped a lot.) I made a couple in different yarns and the one was varigated. He ended up looking like he was related to a sock monkey in color except for the red. I finished him before I got to that color in the yarn. So crocheted the red into a little scarf for him. Gave them a couple whiskers too…lol. Thanks again for the cute pattern.
LikeLike
Thanks for sharing🙏😍💝
LikeLiked by 1 person
My first attempt at making limbs, they looked so much cuter when they can wave back!!! Thank you for your generosity..
LikeLike
Adorable! I made one using leftover worsted weight yarn from an afghan I made. I used pink yarn for the tail, eyes, nose and 8-stitch magic ring center of the ears. I stitched the ears in place before closing up the head, and I stuffed the body with catnip–my cat adores her new toy!
LikeLike
This is the best tutorial I’ve ever come across. Truly… the pix are perfect the words are few and right on the money. I tried to make a very similar mouse from a different pattern and I just couldn’t visualize what the designer was talking about. I’m inspired to try some of your other designs.
Thanks, Paul
LikeLike
Thanks Paul, I love to get these comments so many years after the original was posted!
>
LikeLike