
This is a doily with attitude…
 Its no shrinking violet, stashed away in a dusty corner… oh no, its definitely a doily looking to be the centre of attention!
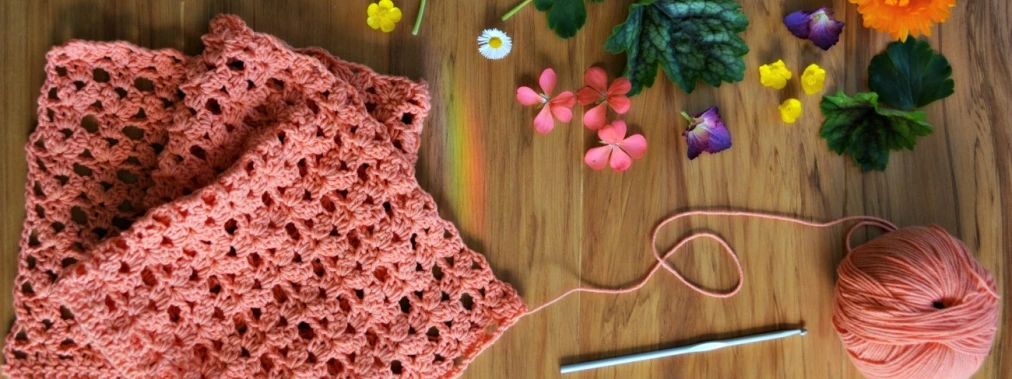
The best part? Its made with a 4mm hook and 8ply cotton so its quick and easy to make – you just need to choose the colours.
Lets begin…
 1. Start with a magic circle, then chain 2 and 7 Double Crochet (DC) into the circle, pull tight and join with a slip stitch (SS). (8DCs)
2. Chain(Ch) 2, DC into the same space. *Chain 1, 2DC into the next space*. Repeat between * and * around and join with a SS. (8 2DC pairs)
3. SS to the first Ch1 space. Chain 2, 2DC into the Ch1 space. *Chain 1, 3DC into next Ch1 space*. Repeat between * and * around (Chain 1) and join with a SS. Fasten off first colour. (8 3DC-1ch groups)
4. Join next colour in a Ch1 space. Chain 3, DC into same space, Chain 3. *DC-Chain1-DC into next chain 1 space, Chain 3*. Repeat between * and * around and join with a SS.
5. Chain 2, 2DC into the next Ch1 space. Chain 1, DC into Ch3 space. *Chain 1, 3DC into next Ch1 space, Chain 1, DC into next Ch3 space, Chain 1*. Repeat between * and * around and join with a SS.
6. *Chain 1, Single Crochet (SC) into next space (in between first 2 DCs on previous round), Chain 2, SC into next space (in between next 2 DCs- 2 and 3 of 3DC group), Chain 1, SC into next Ch1 space, SC into next Ch1 space.* Repeat between * and * around and join with a SS. Fasten off second colour.
7. Join new colour into a 2Ch space. Chain 2, DC into the same space, Chain 1, 2DC into the next CH1 space. Chain2, skip space between 2SCs, *2DC into next Ch1 space,Chain 1, 2DC into next Ch2 space, Chain 1, 2DC into next Ch1 space, Chain 2, skip space between 2SCs*. Repeat between * and * around, Chain 1 and 2DC in last 1Ch space, Chain 1 and join with a SS.
8. Chain 3, SC into space between next 2DC pair, Chain 2, 3 Half Double Crochet (HDC) into next Ch2 space, Chain 2. *SC into next Ch1 space, Chain 2, SC into next Ch1 space, Chain 2, 3HDC into next Ch2 space, Chain 2*. Repeat between * and * around and join with a SS.
9. SS into first Ch2 space. Chain 3, SC into next Ch2 space. * Chain 4, SC into next Ch2 Space, Chain 3, SC into next Ch2 space, Chain 3, SC into next Ch2 space*. Repeat between * and * around, Chain 4, SC into last Ch2 space, Chain 3, and join with a SS into starting chain. Fasten off.
10. Join new colour in the first of the two Ch3 spaces. Chain 3, SC into next Ch3 space, Chain 3, *4DC into next Chain 4 space, Ch3, SC into next Ch3 space, Chain 3, SC into next Ch3 space, Chain 3*. Repeat between * and * around to last Ch4 space, 4DC into space, Chain 3 join with a SS into starting chain.
11. SS into 2Ch space, Chain 2, DC into same space, Chain 3, *HDC into next 3Ch space, Chain 3 put 1 DC into each space between the next 3 DCs (three DCs made), Chain 3, HDC in next 3Ch space, Chain 3, 2 DC in next 3Ch space, Chain 3*. Repeat between * and * 6 more times. HDC in next 3Ch space, Chain 3, 1DC into each space between the next 3 DCs (three DCs made), HDC in next 3Ch space, Chain 3, join with a SS into the top of starting Ch2. Fasten off.
12. Join new colour between a 2DC pair. Chain 2, 2DC into the same space, Chain 2, SC into next 3Ch space, SC into next 3Ch space. *Chain 2, 2DC into first space between next 2DCs, Chain 2, 2DC in space between next 2DCs, Chain 2, SC in next Ch3 space, SC into next Ch3 space, Chain 2, 3DC in between next 2DCs, Chain 2*. Repeat between * and * around, SC in next Ch3 space, SC into last Ch3 space, Chain 2 and join with a SS. Fasten off.
13. Last round! Join new colour between a 2 SC pair next to a 3DC group. *SC in between the two SCs, SC in next Chain 2 space, Chain 3, SC in space between next 2 DCs, Chain 5, sc in space between next 2DCs, chain 3, SC in 2Ch space, SC between next space between SCs, Chain 3, SC in next 2 Ch space, HDC in next space between 2DCs, 4DCs in next 2Ch space, HDC in next space between 2 DCs, Sc in next 2Ch space* Repeat between * and * around and join with a SS to finish the round, fasten off.
Weave in all ends. If its not sitting as flat as you would like either block it or if you are lazy like me lightly iron on the reverse side (put a hanky or tea towel between the doily and the iron).
That’s it, enjoy…
 So bright and cheerful its sure to brighten a needy spot at your place!!
I want to say a huge thank you to three very talented ladies who tested this pattern for me (go and check out their blogs and see what they’ve been up to);
Thank you so much for patience with the pattern and giving me your really valuable feedback xx

Oh my goodness – I’m definitely doing this one 🙂 I’ve been searching for the perfect gift for a friend of mine & I think this is it!!
LikeLike
So glad you like it, Ive already made a couple of extras for gifts too!!
LikeLike
This is amazing! As everything I find here at The Green Dragonfly. ♥
LikeLike
Thanks Sara!
LikeLike
Wonderful site. Great tutorials !
LikeLike
You are welcome! I had a lot of fun making your doily. It is has found a very nice place in our living room now. 🙂
LikeLike
Thanks so much for all your help Barbina!
LikeLike
Thanks for another great pattern. It looks great, think I could put a few of those on the table for Christmas in red and white.
LikeLike
Now that’s a good idea!
LikeLike
Yep.. definitely one for Chirssie pressies.. thanks so much Janette :)x
LikeLike
My pleasure 🙂
LikeLike
This is wonderful. I love those bright colors. Surely it isn’t my grandmother’s doily. 🙂 Beautiful.
LikeLike
Thanks Katie!
LikeLike
I shall definitely be making some for gifts this Christmas 🙂
So quick and easy. Even the boys on tour were fascinated as it grew 🙂
LikeLike
Wow, very nice, I’ll have to give it a try!
LikeLike
Do, its so quick and easy!
LikeLike
Sadly, got to round number 12 and got super confused I just gave up and ended the doily off. Not as quick and easy as I had hoped for my very first doily project. 😦
LikeLike
Im so sorry you had trouble with the pattern, did you look closely at the pic at the top of the post? you can click on it and enlarge it as big as you need to?
LikeLike
easy read on the pattern, i have mine under a bowl in the kitchen for all my dishcloths and scrubbies! thank you for posting!
LikeLike
Sounds like the perfect spot for it!
LikeLike
Very sweet.. I may have to give this one a try! Thanks for sharing your pattern!… Best wishes to you for a blessed and very Happy New Year! ~tina
LikeLike
Oooooh this looks so pretty! Must make one, immediately! 😉
xo,
wink
LikeLike
lovely …must give this a try :0)
LikeLike
Love relearning crafts my nan taught me, but I let slip from my memory..Thankyou!
LikeLike
Thank you for a simply beautiful pattern! I’ve spent days looking for a fresh modern pattern using yarn instead of thread and this fits the bill perfectly! Your pattern is well written, so I’ve managed to whip the first of three up in no time! I’m doing a solid colour for my Dad and step Mum, but I’ll be sure to make some awesome multicoloured ones for myself! Thanks!!
LikeLike
Im so glad you liked it- thanks for the lovely feedback! Id love to see a photo too! Jxx
LikeLike
Hi Janette
I started crocheting this beauty yesterday and it seems that, either I’m making a mistake or maybe using the wrogn kind of yarn because it starts getting smaller hence stiffing up…
Any clues, did it happen to you?
Of course not, you created the pattern… oh help!
LikeLike
Hi Catalina it sounds like you may be using too smaller hook for your yarn. What weight yarn and hook are you using?
LikeLike
I have begun crocheting your doily pattern for a special dinner at our church. I understand the pattern, but do not know what “the magic circle” is that begins the doily. I’ve tried different combos of single crochet that begin a pattern, but am not positive I am on the right track. Can you help? What is the “magic circle”?
LikeLike
Hi Toni, Check out this video on YouTube:
if you can’t manage it just start with ch4 and join with a ss to make your starting ring. Hope that helps! J
LikeLike
What is the finished size?
LikeLike
Hello, mine are about 22cm across, I guess this would vary depending on how thick the yarn was and the size hook you use though.
Hope that helps!
Janette
LikeLike
I absolutely love this pattern but I just wondered if you are sure about the last row?
LikeLike
This is just gorgeous! I can hardly wait to try. Thank you very much for sharing these lovely designs ~B
LikeLike
Pretty new to crocheting, and don’t want to sound like an idiot, but what is a magic circle?
LikeLike
Hi there, great looking starter doily. If I were to make this with thread as opposed to 4ply what size hook would you recommend and how big do you think it would be. The reason for asking is I am after some simple doilies at about 6 inches / 15cm. What would you suggest.
Thanks again Kathy.
LikeLike
Hi Kathy, some of the feedback has been is that this isn’t the easiest pattern to follow so I’m not sure I’d recommend it for a starter doily. Working with 8ply yarn in my experience is much easier than crochet thread, so I’m thinking making it with that would make it harder still. Hope that helps 🙂
LikeLike
What size does this turn out please? xx
LikeLike
This is beautiful!
LikeLike
Hi, I have just had a go at this pattern using 1mm macrame hemp to for a natural style. I’ve never tried crocheting with this before – a little tricky, but it does look nice. It finished up rather crumpled, so it’s currently blocking upstairs. I really hope the blocking works on hemp! Sadly I got the start of the final round and ran out of thread, so had to end it early this time 😦
Hopefully it will still look ok though, and it gives me a lovely excuse to buy some new supplies…
Thank you!
LikeLike
Oh I’d love to see how it turns out!!!
LikeLike
Thank you – I have written about it here: http://idlethumbs-itchyfeet.blogspot.co.uk/2013/03/hemp-doily.html
I hope you like it!
LikeLike
Just made this – so excited because it’s the first real pattern I’ve ever followed and now I feel like I can really crochet! Thank you for helping me master magic circles too xx
LikeLike
love love love!!! Love it! beautiful, I used white canvas as background and hang it on the wall! Superb! thank you xxx I
LikeLike
Wow sounds wonderful, Id love to see a photo? jxx
LikeLike
I just made one and I LOVE it! Thank you so much for posting this!!! Great pattern!
LikeLike
Hi Betty, thanks so much for letting me know 🙂
xx
LikeLike
Do you have a photo of just round 6 please? I am confused.
LikeLike
Hello wondering if u could help I’m a little confused on Round 6
LikeLike