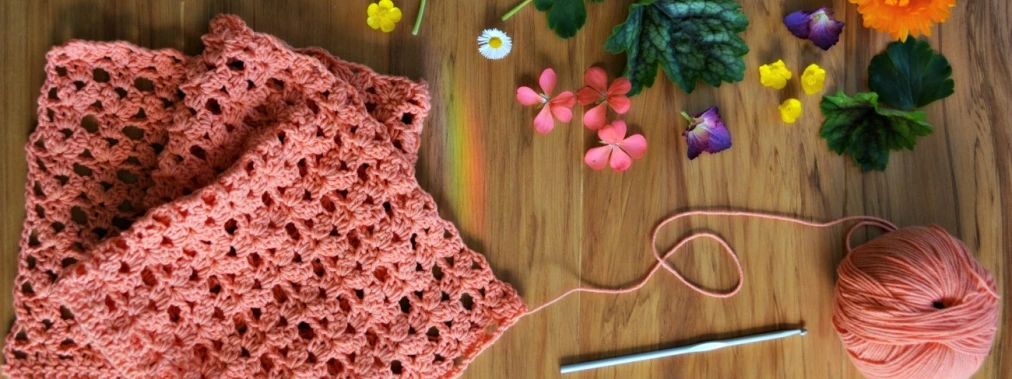
Ta da! A new crocheticious stool cover… I love how bright and cheerful it turned out.

Would you like to make one of your own? Well you have come to the right place, read on…
Crochet stool cover tutorial
You will need: Yarn in a variety of colours, all of a similar weight. I used a mix of acrylic and wool for this stool from my stash, all in DK.
A 4mm crochet hook.
A stool 😉
Round 1. Begin with your first colour, chain 5 and join with a slip stitch (ss) to form a ring. Chain 3 and Double Crochet into your ring, chain 1, *2 double crochet into the ring, chain 1*. Repeat between * and * 4 more times (so you have 6 dc pairs with a chain 1 between each of them). Join with a ss to the top of the chain 3.
Round 2. Fasten off and join with second colour (light pink) in one of the chain 1 spaces. Chain 3 and dc into the same chain 1 space, chain 1 and 2 dc into the SAME space. Working into the next chain 1 space *2dc, chain 1, 2dc*. Repeat 4 more times (you will have 6 pairs of 2dc, chain 1, 2dc), join with a ss into the top of the chain 3 you began the round with.
Round 3. Using the SAME colour chain 3, make 6 dc into the SAME space. Make 7 dc into each chain 1 space, and 7dc into each space between the 2dc pairs around. Join with a ss into the top of the chain 3 you began the round with – you will have 12 7dc clusters around.
 Round 4. Fasten off, and join new colour (bright pink). Make a single crochet (sc) into the top of the 3 chain form the previous round. Sc into the top of the next 4 dc, you will now do a dc into the third round space. To reach the space you will have to pull up a very long loop and make a very long dc stitch. Sc in the next 3 dc, then another long dc into the third round space. See the pic- its not as tricky as it sounds. Repeat 10 more times, join the round with a ss into the first sc.
Round 5. Fasten off and change colour (orange) in this round you will be double crocheting (dc) in each sc around (skipping the dc with a chain 1): *4dc, chain 1, 3dc, chain 1* repeat between * and * around, join with a ss into the first dc.
 Round 6. Fasten off and change colour (yellow). Dc into the top of each stitch of the previous round and dc into each chain 1 gap. Join with a ss into the first dc.
 Round 7. Fasten off and join next colour (light green). Chain 3, DC into the next 4 stitches of the previous round. As before you are going to dc twice into the fifth round space. To reach the space you will have to pull up a very long loop and make a very long dc stitch. The round will look like this: *dc 4 times, 2 long dc into round 5, dc 3 times, 2 long dc into round 5*, repeat between * and * around. Join with a ss into the top of the chain 3 that started the round. Confused? See the pic below (so much easier to understand than words!)
 Round 8. Ok, we are starting to get there… Fasten off last round and join with a new colour (darker green). Join your yarn between the first two of a 4dc group, chain 3, dc in between next 2 dc, chain 1 and skip 1 dc, *2dc in between the 2 long dc stitches (that went to the round below), chain 1 and skip 1 dc, dc in between next dc, 2dc in between next dc, chain 1 and skip 1 dc, 2dc in between the 2 long stitches, chain 1 and skip 1 dc, dc between the next 3 stitches, chain 1 and skip 1 dc*, repeat between * and * around. Join with a ss into the top of chain 3.
 Round 9. Fasten off, join new colour (light blue) between dc 1 and 2 of a 3 dc group. Chain 3, dc in between each dc around, making 2dc in between the 2 dc pair, (this was the pair of dc between the long dc of the previous row), join with a ss into top of chain 3. NB there are no spaces or chains, and no skipped stitiches on this round.
 Round 10. Fasten off, join new colour (royal blue) beside a 2dc pair. Chain 3, 1 long dc stitch down to the chin 1 gap of round 8, *dc in between the next 3 dc, 2 long dc down the the chain 1 gap of round 8, chain 1 and skip next 2 dc (pair), 2 long dc down the the chain 1 gap of round 8, dc between the next 3 dc, 2 long dc down the the chain 1 gap of round 8, chain 1 and skip next 2dc (pair)* repeat between * and * around, join with a ss into the top of the chain 3.
 Round 11, getting there! Fasten off and join new colour (dark blue). Dc in between each dc around, making 3dc in each chain 1 space. Join with a ss into the top of the chain 3.
 Round 12. Almost finished (I promise!)… Fasten off, and join new colour (lavender) next to a 3dc group. Chain 3, dc in between the next 2 dc, chain 1 *dc in between the next 5 dc, chain 1, dc in between the next 4 dc, chain 1*, repeat around, dc in between the last 2 stitches, join with a ss into the top of the chain 3.
 Round 13. Fasten off and join new colour (bright purple) in a chain 1 space. Chain 3, and dc into the same stitch, * dc in between the next 3 dc, 2dc in between the next, dc in between the next 4 dc, 2dc in between the next* repeat between * and * around. Join with a ss into the top of the chain 3.
 Round 14. Final round (phew!), fasten off and join new colour (purple), chain 3 in between the first 2 stitches of a 4 dc set, dc in between next 3 dc, *3 long dc (down to the chain 1 gap of round 12) , dc in between next 4 dc, 3 long dc (down to the chain 1 gap of round 12) , dc in between next 3 dc*, repeat around, join with a ss to the top of the chain 3. Fasten off.
Cover sides: Chain 2 and hdc into the back loop of each stitch around. Join with ss in top of chain 2. Next and all subsequent sides; Chain 2 hdc into each stitch around. Join with ss in top of chain 2, continue until the cover is slightly longer than the depth of your stool top, fasten off and leave a long end.
Finishing. Weave in all ends. Thread long last end onto needle and sew a running stitch around the last hdc of your cover side. Put cover over stool and pull running stitch tight. Don’t pull it so tight that you can’t remove the cover, just tight enough to hold it firmly in place and stop the cover sliding off. Fasten off and weave in the last end and that’s it all done! Enjoy… If you have any questions ( I admit my instructions are a bit poor in places), just leave a comment or send me an email.
Have a bright and beautiful weekend! Janette xoxo
 Here it is brightening up a corner of our home!

it looks great! I’ll have to do this soon! Thanks for sharing 🙂
LikeLike
Hi Janette. This is gorgeous as all of your work seems to be. I’m loving your blog so much I must add you to my blog list for everyone to see. Wishing you a happy week. 🙂
LikeLike
What a great idea, I have a small Ikea Mamut stool that could use some jazzing up.
LikeLike
We recently bought and moved into a wonderful old farmhouse with a country cottage feel. I need to re-cover a cushion & this is perfect – love the bright colors! Thanks for sharing your great projects.
LikeLike
i just love your stool it is so pretty.
LikeLike
Such a pretty project. Just beautiful. Love your vibrant sense of colour.
LikeLike
This is absolutely gorgeous and I want to make one from your tutorial. Are Round 3 instructions missing or is this misnumbered. Thanks for sharing!
LikeLike
Hi Kay, thanks for spotting this! I had included the instructions in round 2, I’ve fixed it now 🙂 cheers Janette
LikeLike
Thank you for the pattern- I am working on it right now. Just a tip: when you say to join “beside” or “next to” a certain stitch, it would help to be a little more specific so we know if you mean on the left or right side. For example, instead of “next to a 3 dc group” specifying after or before the 3 dc group would have been more helpful. Also, I think round 10 is supposed to be chain instead of chin? Once again, thanks for the pattern! I was looking all over for one and I love the way it is turning out. 🙂
LikeLike
Thanks for your feedback, I’ll update the pattern and fix the spelling! J
LikeLike
Thanks for the pattern! I love it. I have been wanting to do something different to my kitchen stools this is perfect fo my country look. I will get to work tonight
LikeLike
Realy good and wonderfully generous of you to post the tutorial. As usual when I see a pattern I like I want to make it and tweak it a little. I am thinking evening colors like black and silver?
LikeLike
Oh sounds lovely!!
LikeLike
The crochet pattern looks lovely. A bit like a Chakra mandalas. Lovely the colors.
LikeLike
This would be perfect for a tam, too; just work til it’s the size of a dinnerplate (depending on head size – a luncheon plate, maybe, for a child), then decrease until it’s head size, then work straight for a few rows for the band. Knitted mitts with a crochet wristband to match, maybe a knit scarf with a crochet border set in a bit from the end, too? Ideas, ideas . . . Thanks again for all the patterns. ~ Linne
LikeLike
I love it! The colors are fantastic – its hippy-chic! Hoping to try one of my own very soon!
Erin
http://likelyhousewife.wordpress.com
LikeLike
I LOVE your stool covers!! What a “brilliant” idea, mentally and visually!! They are so pretty!! Now I know how to use up some of that boxfull of odds and ends yarn I have!! Thank you soooooo much for sharing!!
LikeLike
This is awesome! i have a little square wooden stool that could use one of these.
LikeLike
I’ve been meaning to recover an old Ottoman cushion and this might be the perfect way to do it! Thank you! Love the colors you use and love your work! So glad I found your blog 🙂
LikeLike
I absolutely love this cover! Just one quick question about the pattern though – in round 3 when you say 6 dc in the same space do you mean the space between the (2dc ch1 2dc)? Because after that its just in the ch1 spaces and never again between the groups which I assume would be lopsided. The finished product seems to have a bunch of dcs in ch1 spaces and in between groups. But can you really fit 7dcs between each space all the way around? Mine comes out very scrunched. Thanks for any help you can give, I am obviously very confused!
LikeLike
Hi Marjoie, its not clear, but I think its in the ch1 (the 2dc ch 1 2dc) and also between the 2dcs… Ill fix it up. Thanks!!
LikeLike
Thanks so much!
LikeLike
Thank you very much for your tutorial but I’m having a hard time fitting 7 dc in between the 2dc ch1 2 dc (7 on the 1 ch and 7 between the 2 dcs) it’s impossible to keep it flat !I’ve tried it twice, counted and counted again ….impossible. very frustrating 😦
LikeLike
Hi Serafina, Im sorry its not working out! I wonder if the yarn you are using is heavier, so maybe you might have to do less dc into each space- maybe only 3 or 4 would work? It shouldnt affect the overall pattern. Hope that helps, Janette
LikeLike
Thank you so much for answering Janette and Marjorie!! Must be it huh?I’m using worsted (#4, medium) I thought about reducing the number to 5 or 6 but I was afraid it would alter the rest of the pattern but so happy to know it won’t because I really like this pattern. Thank you so much ladies 🙂
LikeLike
Serafina, I ended up having the same problem because I am using a heavier yarn. I just did 5 dc in between each space and it worked out pretty well. I am using a standard worsted weight (Red Heart). Hope that helps!
LikeLike
Thank you 🙂 i will try that! Was afraid it would alter pattern but glad it doesn’t !
LikeLike
Como logra traducirla al español
LikeLike
Thanks for this info, I just bought two cute little stools I plan on painting red. Now I have pattern to crochet for the top! Great job and love the colors too!
LikeLike
Hi great pattern and idea! Making one as I crochet!
Thanks Caite’s Mummy
LikeLike
Meant to say as I type!!
Thanks again
LikeLike
Great! I hope your stool looks lovely when its finished 🙂 Jxx
LikeLike
Oh I really like that little stool cover.I plan to try that.But Id love it if youd give some imfo.on your really lovely little stool.
LikeLike
G’day Janette I just found you on Pinterest & love your stool cover which I hope to have made into a hanging mandala for a friends wall in her surgery’s treatment room by the end of the w/e… Thank You for your creativity & sharing… ❤ from over the ditch… ❤
LikeLike
Reblogged this on adornosmalulu.
LikeLike
Could you do a pattern for printing. I have a hard time following the instructions with all the pics. I love the pics but not when I’m actually doing the item.
LikeLike
Stools vary in size… mine doesnt fit
LikeLike
I was wondering what is the measurements for the finished piece ? I want to make this to cover a foot stool and wanted to know before I start so I can adjust the size bigger or smaller .
Thank you for making this great pattern can’t wait to start it !!
LikeLike
can your crochet piece be removed from the stool to be washed? From karla
LikeLike